Categories
Mains Recipes

Roast Veg Tartlets

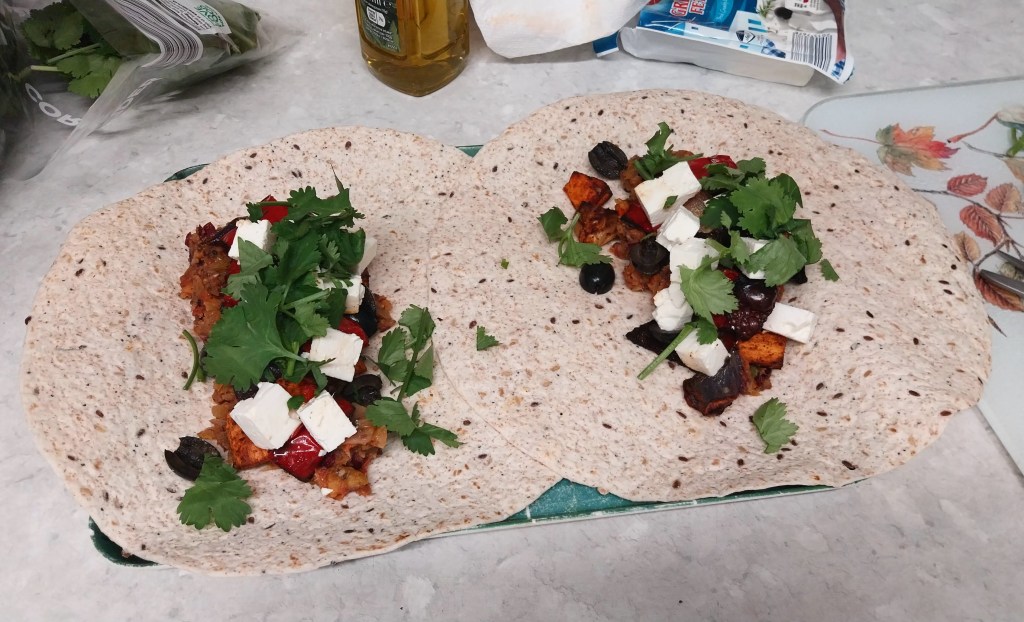
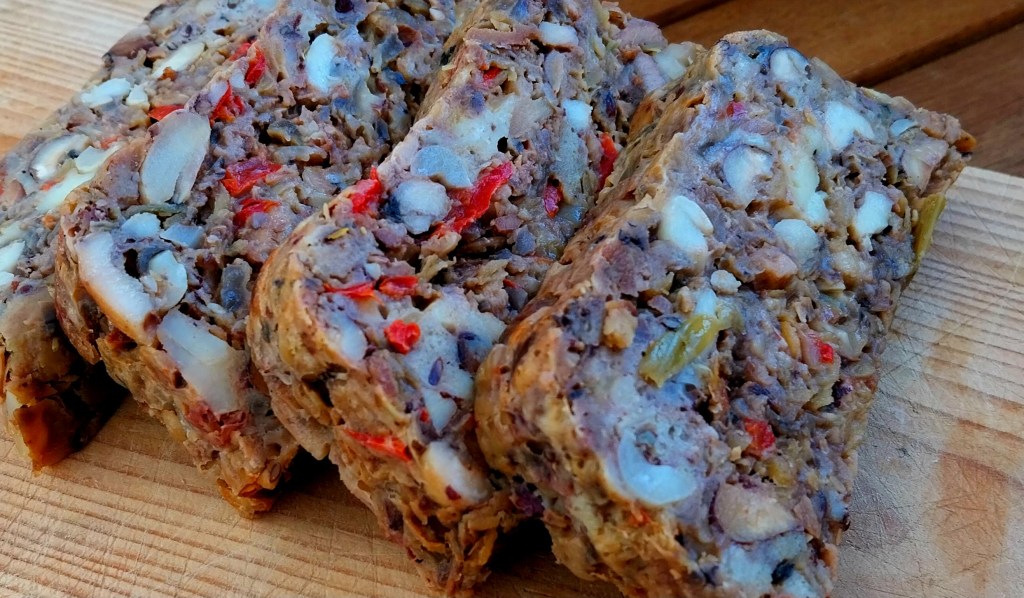
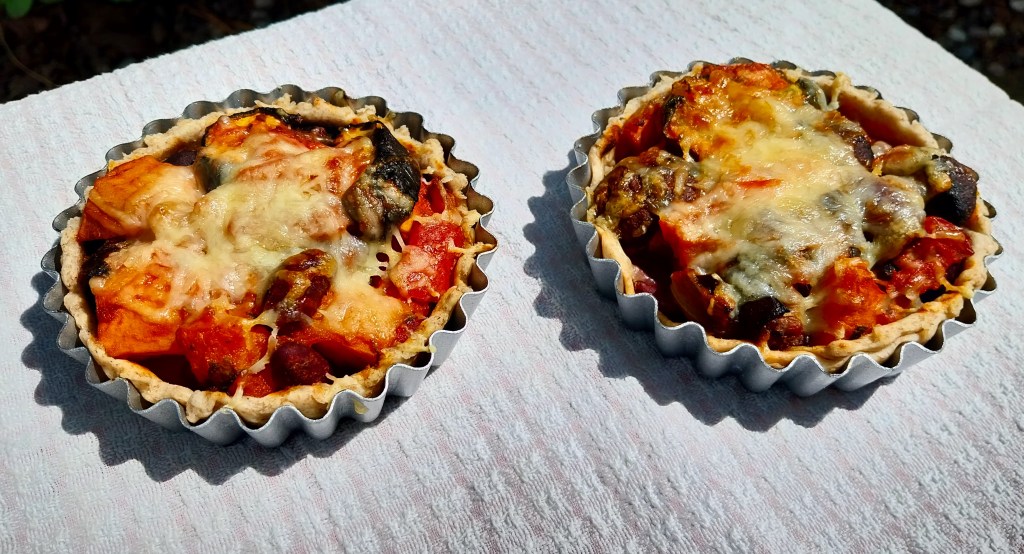
Warm ’em up, or eat ’em cold. Either way, these individual vegetarian tartlets will provide an attractìve, appetising, tasty and nutritious lunch. They’re also a great way to use up leftovers.

Servings

2 tartlets, so a light lunch for 2.

Timings

30 mins to roast the veg while you make the pastry and the tomato sauce, then 15 mins to bake at 180C.

You Will Need:

  • A couple of individual sized flan/tartlet dishes
  • 1 small sweet potato
  • 3 – 4 chestnut mushrooms
  • Half a red pepper
  • Drizzle of olive oil
  • A sprinkle of dried mixed herbs
  • 110g plain wholemeal flour
  • 50g butter
  • Pinch of salt
  • 2 – 3 tbsp cold tap water
  • Half a red onion
  • 1 clove of garlic
  • 3 – 4 tbsp tomato passata
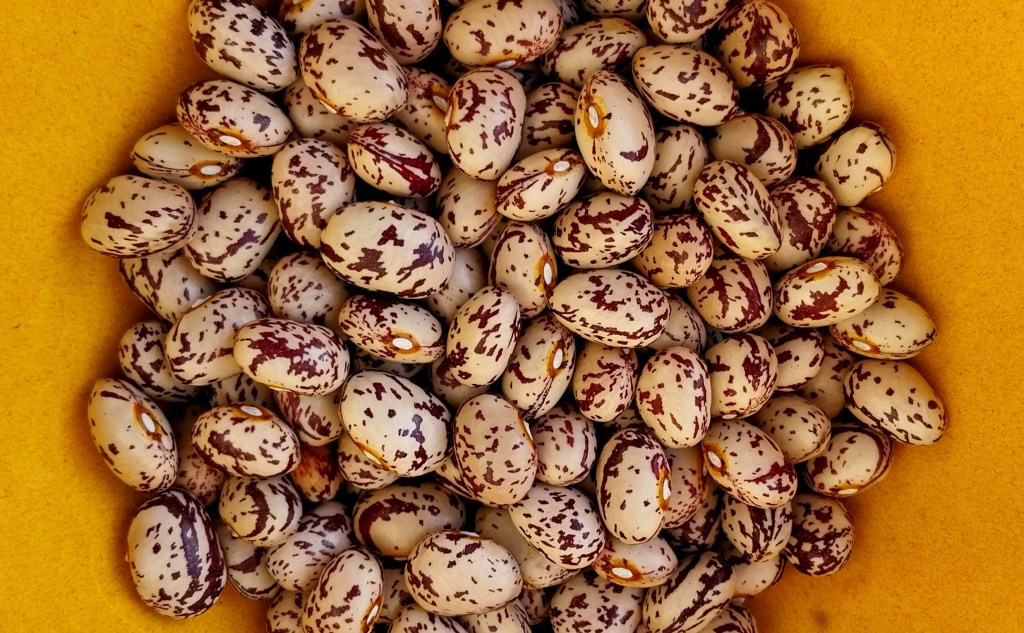
  • Half a 400g tin of kidney beans
  • Black pepper
  • Strong hard cheese, like mature cheddar or parmesan, for grating

Method

  1. Turn a fan oven on to 180C.
  2. Peel and chop the sweet potato into 1 – 2 cm sized chunks. Quarter the mushrooms, and cut the red pepper into pieces the same size as the sweet potato. Place all in a roasting dish. Sprinkle with the herbs and drizzle with oil, then place in the oven for 30 mins.
  3. While the veg is roasting, get started on the pastry. Sieve the flour into a food processor with blade fitted. Chop the butter into small cubes and add to the flour with a pinch of salt. Pulse a few times until it resembles fine breadcrumbs. Drip in the water and pulse again, until you have a ball of soft dough. Remove, wrap in cling film and place in the fridge while you make the tomato sauce.
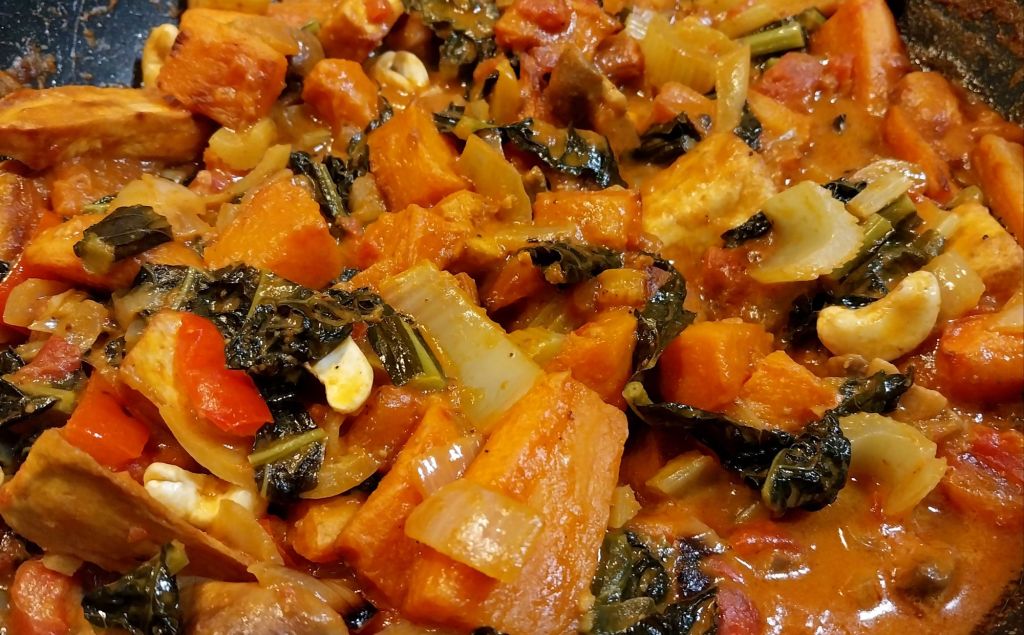
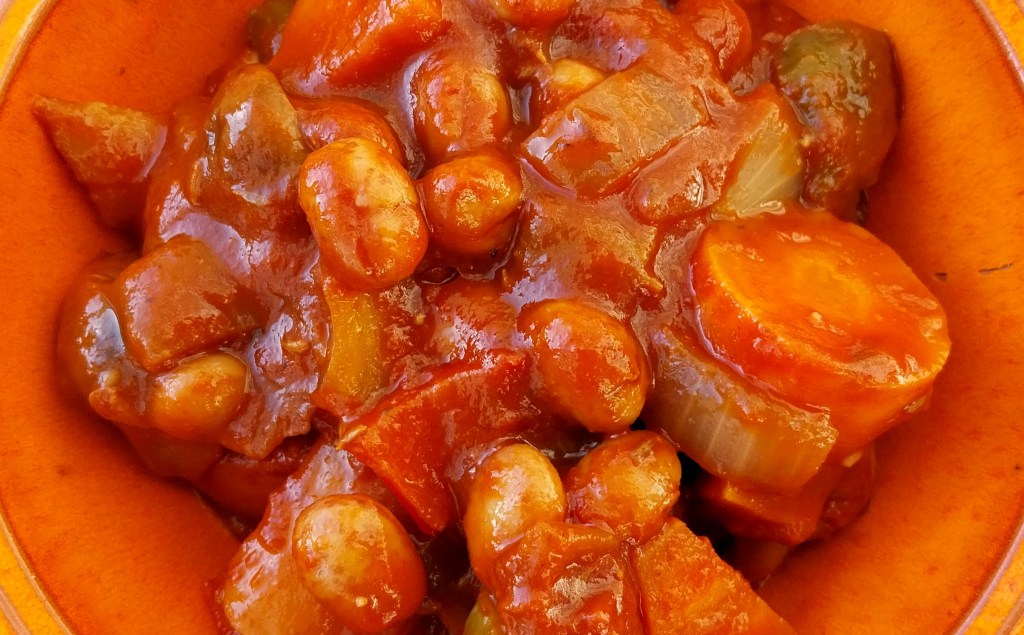
  4. Warm a few drops of the oil in a saucepan. Crush in the garlic and add the onion, finely chopped. As it softens, add in the passata and kidney beans. Give it a few twists of black pepper. Stir to mix and let reduce for a few minutes, until you have a thickish consistency.
  5. Grease the individual tartlet dishes with butter. Take the pastry dough from the fridge and roll out on a floured surface, then use to line each pastry dish. Prick each a few times with a fork.
  6. When the veg has finished roasting, scrape it all into the saucepan and mix in with the tomato and kidney beans. Leave the oven on.
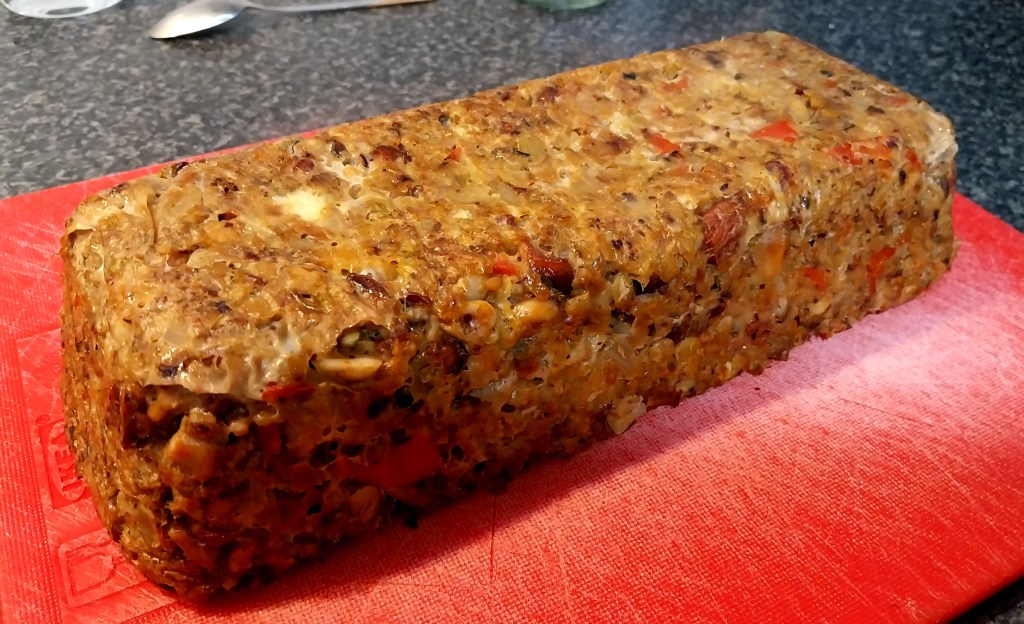
  7. Spoon the veg and tomato mixture into the tartlet cases, then top with the grated cheese. Place in the oven for 15 mins until baked, with the cheese browned.
  8. Serve up with seasonal steamed veg, or let cool and enjoy with salad.

Customise it!

Swap in an̈y leftover veg you may have that is good for roasting: parsnip, carrot, celeriac, green or yellow pepper. Chop up a few celery stalks and add to soften in the tomato sauce. Try grating Stilton over to give another taste twist.

Recently, I’ve been revisiting the great REM albums from the 1990s. I played these a lot when first released and have always admired the band’s music. I feel quite privileged to have seen them play live on two occasions when they visited the UK. Here’s one of many fave tracks, this one from the New Adventures in HiFi album: Bittersweet Me.

Categories
Mains Recipes

Sesame Miso Shrooms

This is a meal where speed is definitely of the essence.

Now that the summer weather is here, I am often out exercising or playing sport with friends in the early part of the evening, returning home later, hungry and ready for a quick, tasty dinner. This dish is perfect for that situation, as it can be thrown together in the kitchen just before my lift arrives, and flash cooked in minutes when I arrive home, famished.

If you are looking for some instant food that is a healthier option than a microwaveable ready meal, then give this a try.

Servings

This is a main meal for 1.

Timings

10 mins to prepare, and 10 mins to stir fry.

You Will Need:

  • 8 or 9 chestnut mushrooms, halved or quartered
  • 1 carrot, cut into 2 – 3cm long thin batons
  • 2 scallions (spring onions) cut into pieces the same length as the carrot batons
  • 1 celery stick, also cut into fine batons
  • 2 – 3cm piece of root ginger, skinned and finely chopped
  • 1 medium chilli cut into fine discs
  • 2 tbsp of couscous or quinoa, prepared as per packet instructions

For the Stir Fry Sauce

  • 1 tbsp miso paste
  • 1 tbsp dark soy sauce
  • 1 tbsp white wine vinegar
  • 1 tbsp runny honey
  • 1 tbsp olive oil

To Serve

  • a handful of sesame seeds

Method

  1. Place all the chopped veg in a bowl and cover.
  2. Put the Stir Fry sauce ingredients in a clean screw top jar, and leave beside the bowl of veg.
  3. When you are ready to eat, heat some oil in a wok and, once it is hot, tip in the veg. Stir until softened and browned.
  4. Shake the jar well to mix up the sauce, then pour on to the veg. You should get an immediate sizzle and a blast of a delicious aroma. Tip in the couscous or quinoa.
  5. Stir to combine, then serve on a plate, topped with the sesame seeds sprinkled over. It should look like my photo at the top of the post.

Customise It!

Stick with the shrooms, but swap in other veg if you wish. Long slices of red onion or sticks of red, green or orange pepper will go brilliantly. Add in a crushed clove of garlic if you can’t resist. To go vegan, simply replace the honey with a suitable sweetener.

This week I enjoyed choosing the vinyl now playing on the turntable at a local coffee shop. They have a wonderful collection of albums from the golden age of vinyl in the 70s, in an era long before CDs and streaming. I chose David Bowie’s Aladdin Sane – a timeless classic – with my Long Black. Here’s the closing track on Side 1: Cracked Actor.

Categories
Desserts Recipes

Rhubarb Crumble

In recent weeks our local market stalls have become brightened by the appearance of a sure sign of spring – stalks of rhubarb cut fresh from the field. I love the way the red, green and pink hues blend and intertwine as if in a watercolour painting.

There are various dishes that can be made with rhubarb,  but in my view the simplest and least complicated is still the best way to enjoy its fresh, juicy, tangy and slightly tart taste. This crumble requires minimal extra ingredients and is relatively straightforward to make.

Servings

6 – 8 portions.

Timings

10 mins to prepare the fruit in a microwave, then 25 mins to bake the crumble in a fan oven at 180C.

You Will Need:

  • 500g fresh rhubarb
  • 1tbsp dark muscovado sugar
  • 225g plain flour
  • 110 g butter
  • 110g caster sugar

Method

  1. Chop the rhubarb stalks into chunks. Place in a bowl and sprinkle over the dark muscovado sugar. Microwave on full power, stirring once or twice to combine, until softened, with still a few chunks visible. Scrape the juicy, sweetened fruit into an ovenproof bowl.
  2. Turn on a fan oven to heat to 180C.
  3. Whizz the flour, butter and caster sugar together in a food processor with blade fitted, until combined and with the texture of breadcrumbs. Sprinkle the crumble over the rhubarb so that the fruit is fully covered.
  4. Place in the oven, when it has reached 180C, for 25 mins. Remove and serve in bowls.

Customise it!

Serve warm from the oven with hot custard poured over – see my photo below.

It’s also delicious cold with custard that has cooled and set, or with a few spoonfuls of natural yoghurt alongside.

Another colourful sign of spring is the World Snooker Championships taking place this time of year, at the Crucible Theatre in Sheffield. As in previous years, I have made the pilgrimage to Sheffield this week, along with other fans of the game. I was lucky enough to see many of the big names play, including Judd Trump, Luca Brecel and the amazingly talented young Chinese star, Zhao Xintong.

On the train up, I just had to play some of my favourite tracks from those famous sons of Sheffield, the Arctic Monkeys, including this one from the Humbug album: Dance Little Liar.

Categories
Mains Recipes

Vietnamese Rice Soldiers

I first came across Vietnamese Rice Soldiers on my travels to Australia, where there is a varied range of Asian cuisine and the quality is high.

Initially I thought they were uncooked sausages when I saw them in a deli takeaway. I soon learned that in fact they contain a mix of finely chopped protein, veg, herbs or spices, with rice or noodles, all wrapped up in a piece of transparent, edible rice paper. They are eaten cold as finger food, with a sauce for dipping, and usually accompanied by a stir fry side or noodles.

I sampled them in a restaurant in Little Vietnam, the name given locally to Victoria Street in Melbourne, and immediately became a fan! I brought home a pack of rice papers and am now able to make my own at home. Here is a photo of my latest batch:

A pack of rice papers is essential if you want to give these a try. I bought mine (below) in Aussie supermarket chain, Coles. Availability will depend on where you are in the world, but in the UK I have seen some smaller packs in M&S. The best bet may be a specialist Asian food store or online.

They are made from simply flour, salt and water, requiring just some fresh, lukewarm water to rehydrate and make them soft and flexible.

Servings

This made 8 soldiers. At 2 per serving, that makes 4 adult portions.

Timings

30 mins to chop and prepare the filling. Rolling up takes seconds. The soldiers can be made up in advance and kept in the fridge for a day or two.

You Will Need:

  • 8 circular rice papers
  • a shallow dish filled half with just boiled water, and half with water cold from the tap (so that overall the water is lukewarm, around 50C)

    For the filling:
  • 120g boiled rice, cooled
  • 1 marinaded chicken breast, cooled
  • 1 carrot
  • around 10cm length of cucumber
  • 2 – 3 scallions/spring onions
  • half a red pepper
  • small bunch of coriander/cilantro

    For the dipping sauce
  • 2 tbsp chilli paste
  • 1 tbsp each of soya sauce, rice vinegar, honey and orange juice
  • a good squidge of tomato passata.

Method

  1. Chop the carrot and cucumber into tiny little batons. Chop the other filling ingredients into small pieces and lay everything out on a board.
  2. Take one of the rice papers and submerge it in the lukewarm water. It will begin to soften and take on a slightly, sticky, stretchy feel. Lay it down on a chopping board and put a line of rice across the middle.
  3. Lay a line of chicken pieces on top of the rice, then follow with the carrot, cucumber, scallions, coriander and pepper. Use a little judgment here – you want the soldier to be well-filled but not overstacked.
  4. Lift the flap of the rice paper nearest you and fold over the filling. Tuck in both sides, then roll the whole soldier forward until you have a sealed parcel. Check out my photos below, showing the rolling up in action! Set aside on a tray.
  5. Carry on until all the soldiers are made up.
  6. Put all the dipping sauce ingredients in a clean, screw top jar with lid on. Give it a good shake to combine, then pour into a serving bowl. The soldiers can be dipped into the sauce, or alternatively, once you’ve bitten off the top, spoon it on and let it drizzle down to mingle with the filling. Yum!

Customise It!

Vary the protein to include small pieces of fish, or use chopped cashews if you want to go vegan. A sprinkle of sesame seeds would be an excellent idea. Swap in fine, vermicelli noodles or bean shoots for the rice. Finely chopped root ginger, corn, celery are also options. As always on A Different Kitchen, use your imagination and go with the ingredients you like.

I served these with a side of stir fried bean shoots, pak choi, root ginger, garlic, red onion, carrot and mushroom topped with a sprinkling of sesame seeds (as shown in my main photo at the top of the post). For the stir fry sauce I simply made up more of the dipping sauce and poured that in. Hey – keep things simple!

It’s Superbowl weekend once more, and I am looking forward to staying up late this Sunday to watch the game. I can’t see any other outcome than the Kansas City Chiefs winning again, as they seem to be invincible when it comes to play-off season. Apologies to any Philly Eagles fans, but who knows, maybe you will surprise me?

Here’s a piece of classic Americana – Tom Petty with Running Down a Dream. Enjoy the Superbowl, everybody.

Categories
Mains Recipes

Gochujang Lentil Roast

This week, my continuing search for comforting winter dinners has brought me to the Korean aisle in my local supermarket, to pick up a jar of Gochujang paste. I have used it before in a few recipes here on A Different Kitchen (Korean Pulled Pork Sandwich, Cauli Roast, Salmon Noodles) and am a real fan of its sweet and smoky taste.

Gochujang is a spicy condiment made from red chilli peppers and fermented soya beans, and is definitely worth a try if you haven’t come across it before. Find it in the Asian section of a reasonable-sized supermarket or in a specialist deli.

In this dish its magical spicy warmth is the base for a hearty lentil dahl-like stew with char-roasted winter veg.

Servings

4 adult portions.

Timings

30 mins to make.

You Will Need

  • a large roasting tray’s worth of chopped root veg – I used carrot, parsnip and sweet potato
  • 1 red pepper
  • oil
  • 1 clove garlic
  • 1 medium red chilli
  • 1 tbsp cumin seeds
  • 2 tbsp gochujang paste
  • 1 red onion
  • 3 celery sticks
  • 500g carton tomato passata
  • 100g red lentils

Method

  1. Switch on a fan oven to 180C.
  2. Chop the root veg and red pepper into chunks and spread out in the roasting pan. Drizzle with oil and place in the oven when it’s up to temp. Leave for 30 mins.
  3. Crush the garlic and place in a wok with a drizzle of oil, over a medium heat. Finely chop the chilli and add to the wok with the cumin seeds. Give it all a gentle stir and leave to sizzle for a few moments.
  4. Add the onion and celery, chopped, and stir again, and add in the gochujang paste. Stir once more so the veg is coated in the lovely smokey red paste.
  5. Tip in the passata. Fill the empty carton with tap water and add this also, then sprinkle in the lentils. Bring to the boil, then turn down to a simmer and leave to reduce and thicken.
  6. When the roasting veg have had their 30 mins, remove the tray from the oven and scrape them into the wok. The veg should be softened and a little charred at the edges. Stir so all the veg is coated, then serve. I served mine with steamed fresh kale, as shown in my photo at the top of the post.

Customise It!

Feel free to swap in whatever roasting veg you have to hand – swede, potato, celeriac can all be contenders, so can mushroom or aubergine.

Dance classic season continues here on A Different Kitchen. Next up is the legendary Teddy Pendergrass, in the form of Harold Melvin & The Blue Notes, with Don’t Leave Me This Way.

Categories
Mains Recipes

Mushroom & Bean Stroganoff

Crisp cold air, weak rays of sun on a walk along an empty beach, NFL play-offs, storms that have their own names, and Chris and Michaela in padded jackets outside a yurt on BBC’s Winter Watch – all the signs that we really are in the far depths of January.

It can only mean one thing in the ADK Kitchen – slow cooker season!

The electric slow cooker is a wonderful invention – chuck in a bunch of seasonal veg with some hearty stock, fresh herbs, a large glass of wine, and leave it to bubble away for a few hours in the corner of the kitchen, unassumedly radiating warmth and a delectable aroma that leaves everyone looking forward to dinner time.

Here’s a new addition to the ADK slow cooker recipe collection – a vegetarian hotpot rich in succulent mushrooms that take on the flavours of a creamy white wine and Dijon mustard sauce, with freshly torn thyme sprigs and the pleasing texture of soft cannellini beans. A true culinary comfort blanket!

No slow cooker? No problem – just use a casserole dish in a fan oven at 140C.

Servings

4 adult portions.

Timings

20 mins to prep – 3 hrs in the slow cooker.

You Will Need

  • 30g dried porcini mushrooms
  • 200ml boiling water
  • a drizzle of oil
  • 1 garlic clove
  • 1 onion
  • 3 celery sticks
  • 1 red pepper
  • 250g chestnut mushrooms
  • 3 tbsp plain flour
  • 150ml veg stock
  • 200ml dry white wine
  • 1 tsp cayenne pepper
  • 2 tbsp Dijon mustard
  • 1 bunch of fresh thyme
  • 1 400g can of cannellini beans

Method

  1. Switch on an electric slow cooker to the high setting.
  2. Cover the porcini mushrooms in the boiling water and let them sit in a bowl for around 20 mins.
  3. Crush the garlic and chop the onion into some hot oil in a wok. Then add in the chopped celery and pepper, and stir.
  4. After a few moments, add in the chestnut mushrooms, halved. Give it all a good stir and let it simmer for a few minutes.
  5. Turn the heat down and sprinkle over the flour. Turn the veg over with a spatula until all of it is coated in the flour, then pour in the stock and wine. Turn the heat up again and stir so that a thickish, creamy sauce begins to form around the veg.
  6. Add in the Dijon mustard and cayenne pepper. Twist in some black pepper and sea salt. Tear in a good few sprigs of the fresh thyme. Tip in the porcini mushrooms and the water they’ve been soaking in.
  7. Add the cannellini beans and mix through, then transfer to the bowl of the slow cooker. Turn down to the low setting and let it simmer for 3 hours, stirring every so often.
  8. Spoon on to warmed plates, and tear over some more sprigs of the fresh thyme. Serve with boiled brown rice.

Customise It!

I’ve used two different kinds of mushrooms – porcini and chestnut – but you could add in a third, maybe swapping in some chunked portobello in place of some of the chestnuts. I was tempted to change the white wine to a full-bodied, warming red, and may do this the next time I make this, as I reckon it will pair well with the beefy-like stock water that comes from the soaked porcinis.

Dance classics season continues in the ADK Kitchen – hey, it helps keep us warm this time of year! Here’s a great opportunity to hone those moves – it’s Gloria Gaynor with Never Can Say Goodbye.

Categories
Mains Recipes

Air Fryer Veg Burritos

The air fryer is the 21st century device that, seemingly, no kitchen should be without. They’ve become extremely popular in a relatively short space of time, and now come in all shapes and sizes, at a generally affordable cost.

The fact it is instantly ready to cook, with no warming up time as with a conventional oven, makes it perfect for prepping quick and easy meals. They are energy-efficient, keeping cooking costs down, are great for small portions, and can deliver health benefits through using little or no oil or fat.

My experience, rightly or wrongly, has been that the most common use of an air fryer is to heat up something ready prepared from the supermarket chilled cabinet. Nothing wrong with that, but I wondered if I could use it to make something quick, tasty and healthy, totally from fresh source ingredients.

So let me introduce you to my Air Fryer Veg Burritos.

Servings

This makes 2 burritos.

Timings

12 minutes to air fry the filling ingredients, and another 12 mins to air fry the burritos, all at 180C.

You Will Need:

  • olive oil
  • 2 tsp smoked paprika
  • a few twists of sea salt
  • 1 sweet potato
  • 1 red pepper
  • 1 red onion
  • a bunch of fresh coriander/cilantro
  • 9 – 10 black olives
  • around 100g feta cheese
  • half a 400g tin of kidney beans
  • half a 400g tin of chopped tomatoes
  • 2 flour tortillas

Method

  1. Chop the sweet potato, red onion and red pepper into chunks, and place in a small plastic food bag. Add a drizzle of olive oil, the smoked paprika and sea salt. Massage the food around in the bag so that all the veg is evenly coated. Tip from the bag, and into the drum of the air fryer at 180C for 12 mins.
  2. While the veg is air frying, chop the feta into chunks, and the black olives in half. Mash the kidney beans and tomatoes together to a thick-ish consistency.
  3. Tip the air fried veg on to a plate to cool slightly.
  4. Lay out the 2 flour tortillas on a board and place the filling in a line down the middle (see photo above). Start with the kidney bean/tomato mash, then add chunks of sweet potato, red pepper, onion, feta and olive. Use scissors to snip in some coriander leaves. Be generous, but don’t overfill, otherwise the burrito may unfurl while cooking.
  5. Wrap up each tortilla, making sure to tuck in the ends to form a parcel, and brush all over with oil. Brushing the ends helps seal them and avoid the filling escaping.
  6. Place in the drum of the air fryer (see my photo below) and cook for 10 – 12 mins at 180C. The tortilla will take on a brown and crispy shell, as shown in my main photo at the top of the post.
  7. Remove, slice each into 2, and serve. I served this with a pot of soured cream and a bowl of Chunky Guacamole.

Customise It!

There is major scope for varying the filling to use up whatever leftovers you may have in the fridge. Pots of chilli, pasta sauce or a lining of a good quality chilli jam can take the place of the kidney beans/tomatoes mash-up.

Mushrooms would be amazing – just air fry them whole at stage 1 above, and then cut into chunks to go in the filling. Skip the feta and add a line of grated cheddar, or maybe some mozzarella. Swap in Cajun seasoning for the smoked paprika. Have fun and use your imagination!

The dance classics theme for the ADK Playlist continues into 2025. Next to step up to the dancefloor are Deee-Lite with Groove is in the Heart.

Categories
Mains Recipes

Roasted Winter Veg Curry

For this dish, which is suitable for both vegetarians and vegans, I’ve given a selection of seasonal squash and root veg a long, slow roast in the oven before coating it in a thick curry sauce. The roasting makes the veg soft, sweet and just a little caramelised around the edges.

We’ve just been experiencing our first few snow showers of the winter here, so all that deliciousness and comforting heat has turned out to be very timely!

Servings

4 adult portions.

Timings

1 hr to roast the winter veg, during which time the rest of the dish is prepared.

You Will Need:

  • 1/2 a butternut squash
  • 2 medium sweet potatoes
  • 2 medium parsnips
  • 3 – 4 medium carrots
  • Oil
  • 1 garlic clove
  • 3cm piece of root ginger
  • 1 onion
  • 2 tbsp curry powder
  • 2 celery sticks
  • 1/2 red pepper
  • 1/2 yellow pepper
  • 5 – 6 chestnut mushrooms
  • 1 400ml tin coconut milk
  • 1 400g tin chopped tomatoes
  • 4 – 5 leaves of cavalo nero
  • A handful of unsalted cashew nuts

Method

  1. Switch a fan oven on to 180C.
  2. Peel and roughly chop the squash, sweet potatoes, carrots and parsnips into chunks. Spread them out in a roasting dish and drizzle with oil. Place the dish in the hot oven for about an hour. Check on them every so often just to check they’re not burning, and give them a scatter with a spatula so they get evenly roasted.
  3. Meanwhile, crush the garlic and finely chop the ginger. Put both in a wok with some oil and heat. When the pan is sizzling, add in the onion, celery, mushrooms and peppers, all chopped. Sprinkle over the curry powder and toss with a spatula so all the veg is coated in a mix of the spices and oil.
  4. When the veg has softened, empty in the coconut milk and tomatoes. Give it all a good stir to mix and bring to a bubble, before turning down to a simmer. Let it slowly reduce to make a thick, spicy sauce.
  5. Shred the cavalo nero and wilt in for about 10 mins.
  6. When the tray of veg has finished roasting, take it from the oven and scrape all the lovely contents into the wok. Give it all a stir again, so that the veg chunks get coated in the thick curry sauce.
  7. Chuck in the cashews and mix, a few mins before serving. It should resemble my main photo at the top of the post.
  8. Serve up with rice on the side – see below.

Customise It!

Lots of scope here – substitute other root veg like potatoes or celeriac, or other types of squash, and vary the proportions between them if you wish, as long as you have 1 large roasting pan’s worth of it all.

Use your own favourite spice combo if you wish – I used the ready mixed blend I brought back from the Souq Waqif in Doha, which I really like. Why not chuck in a few nigella seeds? Play around and have fun!

No cavalo nero? Try other greens like spinach or chard.

Time to treat you to my most streamed song of 2024, as confirmed by Spotify Unwrapped, which landed this week. I first came across this indie band while on my travels to Australia earlier this year. They make a terrific sound and, I’m sure you’ll agree, this really is a very good track. Enjoy These New South Whales with Changes.

Categories
Mains Recipes

Nut Roast

Toasted on the outside and packed to the core with creamy, crunchy nuts, red lentils and softened veg. If you’re looking for a vegetarian mains to grace the centre of your table this winter, this delicious, homemade Nut Roast is hard to beat.

Servings

6 adult servings of 2 generous slices each.

Timings

30 mins to prepare and 50 mins to roast in a fan oven at 160C.

You Will Need:

  • 150g chopped mixed nuts
  • 1 onion
  • 2 celery sticks
  • 1/2 a red pepper
  • 1/2 a yellow pepper
  • 6 – 7 chestnut mushrooms
  • oil
  • 1 clove garlic
  • 75g red lentils
  • a good squelch of tomato ketchup
  • 300ml boiling water
  • 1 tbsp vegemite
  • 75g wholemeal breadcrumbs
  • 75g mature cheddar cheese, grated
  • sea salt and black pepper
  • 2 medium eggs

Method

  1. Switch a fan oven on to 160C. Grease a 1 litre loaf dish and line it with baking paper.
  2. Spread the nuts on a baking tray and place in the oven once its reached its temperature.
  3. While the nuts are roasting, place the onion, celery, pepper and mushrooms in a food processor with blade fitted. Blitz to small pieces.
  4. Heat some oil in a large frying pan and crush in the garlic. Add in the blitzed veg and stir. Leave to gently soften.
  5. Once the nuts have roasted for 10 mins, remove from the oven and roughly chop in a food processor with blade fitted. Scrape into a large bowl and set aside.
  6. Chuck the lentils into the frying pan with the veg. Dissolve the vegemite in the boiling water and pour into the pan with the ketchup. Bring to the boil, then reduce to a simmer for about 15mins. The liquid will reduce as the lentils soften.
  7. Add the breadcrumbs and grated cheddar to the nuts and mix in.
  8. Leave the pan of veg and lentils to cool slightly for 5 mins, then add to the bowl with the nuts, breadcrumbs and cheese. Twist in a little sea salt and black pepper to your taste. Crack in the eggs and mix thoroughly.
  9. Spoon the mixture into the prepared loaf dish and compact it down with the back of a spoon. Cover with foil and place in the oven for 30mins. Then remove the foil and leave it in the oven for another 20 mins.
  10. Remove and set aside for 10 – 15 mins before inverting onto a chopping board. The nut loaf should ease out of the upturned dish, and look something like my main photo at the top of the post.
  11. You can cut slices straight away, but it will become progressively easier to cut clean slices as it cools. Slices can be reheated if necessary by microwaving for 30 – 60 seconds.

Customise It!

Try adding in fresh herbs, or shreds of cavalo nero. Swap some or all of the cheddar for crumbled blue cheese.

Serve it with some green veg and a simple sauce made from a can of chopped tomatoes, garlic and chopped onion. If you’d prefer to save on effort, serving with condiments like ketchup or relish is fine.

Exciting musical news this week is that one of my favourite bands has been announced as headliner at next year’s Victorious Festival. I have already seen Queens of the Stone Age live 4 times and am very keen to make it 5. I’ll be hoping a surprise gift ticket may find its way to me under the Christmas Tree this year! I expect they will play this one: Queens of the Stone Age with Sick, Sick, Sick.

Categories
Mains Recipes

Beautiful Borlotti

This harvest of borlotti beans, fresh from the pod (shown in my photo above) has been a very welcome arrival recently in the ADK Kitchen. I always think they are one of the most beautiful foods in their natural uncooked form.

They’re not bad cooked, either. The beans do tend to lose that magical, mottled sheen, but more than make up for it in their creamy, smoky taste. They also provide generous amounts of protein and fibre.

For this dish (shown in my photo below), I have given them a starring role in a chilli suitable for vegetarians, vegans and, indeed, anyone who enjoys a bowl of rich, warm and creamy comfort food this time of year.

Servings

4 adult portions.

Timings

The beans soak overnight, and are then boiled/simmered for at least an hour. Once these stages are complete, the rest will take about 30 mins to cook.

You Will Need:

  • 120g uncooked borlotti beans
  • cold water
  • 1 onion
  • 1 garlic clove
  • 1 tsp chilli powder
  • 1 tsp cumin seeds
  • oil
  • 1/2 a red pepper
  • 1/2 a green pepper
  • 2 celery sticks
  • 1 carrot
  • 6 -7 chestnut mushrooms
  • 1 400g carton of tomato passata

Method

  1. Wash the beans, then place in a bowl with enough cold water to cover them. Leave for 24 – 36 hours.
  2. Drain and rinse the beans under cold running water. You should find that they have doubled their weight through the water they have absorbed. Place the beans in a saucepan with enough fresh water to cover them, and bring to the boil. Reduce and simmer for 50 mins.
  3. Drain the cooked beans and wash again under cold running water. Set aside.
  4. Heat some oil in a wok, and add in the garlic, chilli and cumin. When it sizzles, add in the onion, peppers and celery, chopped into chunks.
  5. About 5 mins later, add in the mushrooms and carrot, also chopped into bitesize chunks.
  6. Stir with a spatula until all the veg is nicely softened, then add in the passata and the cooked borlottis. Top up with about half an empty carton’s worth of fresh water, and turn it up to boil.
  7. Bring to a simmer for about 15 mins, by which time the sauce will have reduced to provide a thick, creamy coating for the beans.
  8. Serve up with a portion of brown rice.

Customise It!

Replace the onion with chopped leeks, and add in some roasted squash if you wish. Shred in some spinach, cavalo nero or chard leaves.

Skip the rice and wrap a few spoonfuls up in a warmed tortilla. Perhaps with some soured cream on the side. This is making me hungry again…

It’s getting to that time of year when I receive messages from Spotify that my Unwrapped Playlist – containing my most played tracks of 2024 – is imminent. Here’s one track that will almost certainly be on it, and which seems to go well with the subject of this post: Leftfield with Pulse.