It’s the season of outdoor cooking, so why not crack open a beer or soft drink and get some skewers roasting on the barbecue?
Mine shown in the photo are made from 5 marinaded chicken breasts cut into chunks, one red pepper and one courgette sliced. The marinade ingredients were a crushed clove of garlic, a finely sliced chilli, some chopped root ginger, a handful of fresh coriander leaves, juice of a lemon, a grind of seasalt, a twist of black pepper, a dollop of olive oil and a squidge of tomato puree to give it some colour. I left the marinading meat in the fridge for about 18 hours in a tight lidded casserole dish. Be warned that an impatient lifting of the lid will release an incredible aroma that will have you salivating and invoke an instant craving for hot food!
I threaded the meat and veg on to 8 wooden skewers about an hour before cooking. The skewers had been soaked in water for about an hour to stop the exposed ends from burning up in the heat. Use a basting brush to coat the slices of veg with the residue of the marinade so that they cook nicely rather than burn.
About 15 – 20 mins on the barbecue should do it, turning the skewers every so often so they cook evenly all over. Serve up with salads plus aforementioned soft drink or beer.
After exploring a few options for a track to add to the ADK Playlist with this post, I’ve settled on this classic from the Doors. To any fans of the Prodigy who may be following, all I’ll say is it was a close-run thing, and I guarantee there will be at least one more bbq-related post for you before the summer is out!
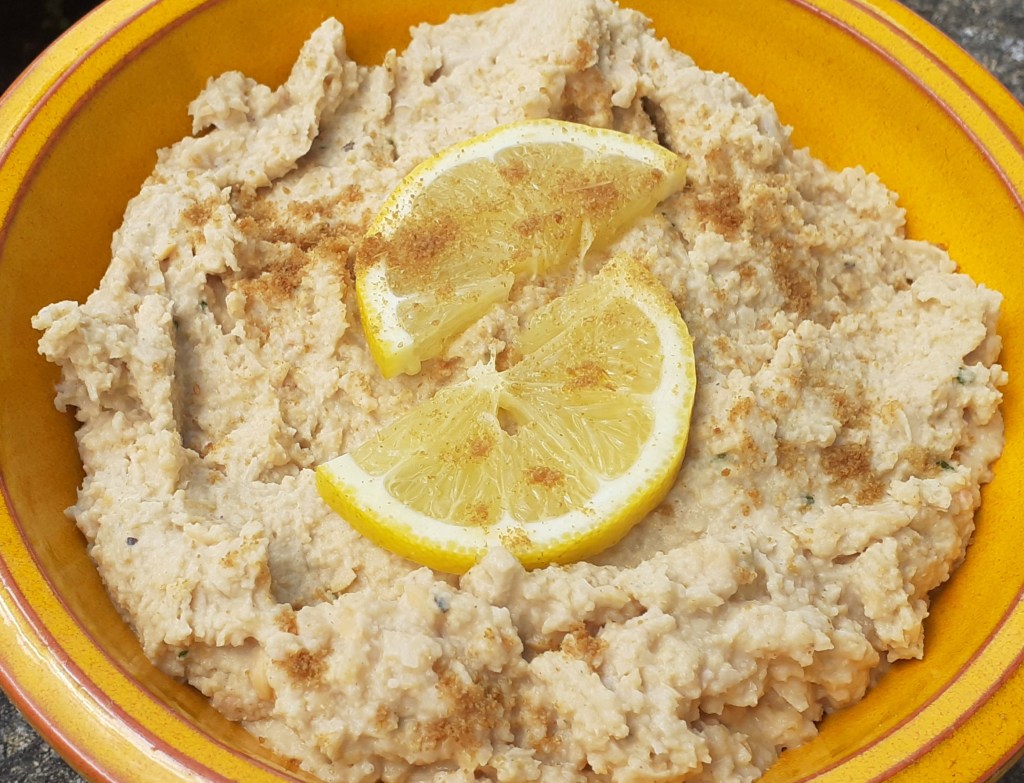
Today’s starter is a lemon hummus, based on a recipe by Hugh Fearnley-Whittingstall. I added a little less lemon juice than the recipe, and added fresh coriander to the usual base of blitzed chickpeas, tahini and olive oil. Topped off with a sprinkle of ground cumin, and served up with breadsticks and crudites, accompanied by a glass of prosecco. Mmm!
Pitched into this yellow earthenware bowl, I think I enjoyed the bright summer sunshine colour of the dish almost as much as the fresh taste. Kept reminding me of this great track from Coldplay, now the latest addition to the ADK Playlist.
Regular visitors will know that this week I’ve been researching how to turn a lovely fresh crop of blackcurrants into ice cream. Well, my photo shows a few scoops of the results! I relied heavily on an old Delia recipe, and updated it for the age of the electric ice cream maker. There is really very little added other than sugar and cream, leaving this tart and vibrant coloured summer fruit to be the star of the show.
Servings
This will make 500g of ice cream, so comfortably enough for 5 – 6 servings.
Timings
15 mins preparation, and 35 mins churning.
You Will Need
400g freshly picked blackcurrants
175g granulated sugar
150ml water
300g double cream
an electric mixer
an ice cream maker
Method
Place the drum of the ice cream maker in the freezer to get really frozen. I usually allow 24 hours.
Press the blackcurrants through a sieve with a bowl beneath. The bowl will fill with divine purplish juice, leaving behind the pips and skins in the sieve, which can be discarded.
Combine the sugar and water in a saucepan and bring to the boil, dissolving the sugar. Simmer for a few minutes, then switch off. Combine with the blackcurrant juice and leave to cool.
Whisk the double cream with a mixer.
Place both the bowl of whipped cream and the bowl of blackcurrant juice in the fridge for a couple of hours to get really cold. Then remove from the fridge and combine, stirring it through so that all the cream takes on a purplish colour.
Remove the frozen ice cream maker drum from the freezer. Tip the blackcurrant/cream mix into it and churn for around 35 mins.
Switch off and spoon/scrape the ice cream out of the drum into a plastic container. Seal and place in the fridge for a good few hours before serving. The longer it has the more it will set.
With this week’s great weather set to continue, I am looking forward to cooking for friends coming over this weekend. I plan to get much of the preparation done in advance, so we can make the most of the time together al fresco, relaxing and catching up over cold drinks and lunch. Home-made ice cream makes an ideal dessert for this, as it can be made earlier in the week and left to sit in the freezer till it’s required.
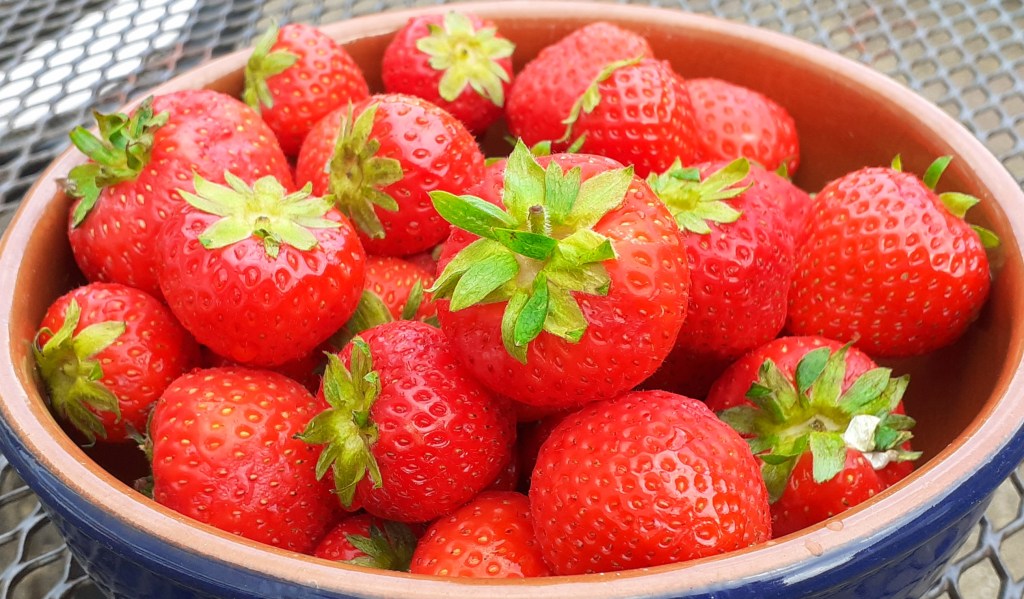
This is particularly true this time of year. We are lucky to have some great soft fruit producers locally (which also helps to keep the food miles down). My photo shows the batch of strawberries I’ve bought to make into ice cream. As I write this, they are chopped, mashed and soaking in sugar and lemon juice in the fridge, waiting to be combined with whipped double cream and churned for a half hour in the ice cream maker. All being well, there should be another post in a few days showing some scoops of the finished product!
Meanwhile, here’s a favourite track of mine by Jamiroquai, that seems to capture that summertime feeling.
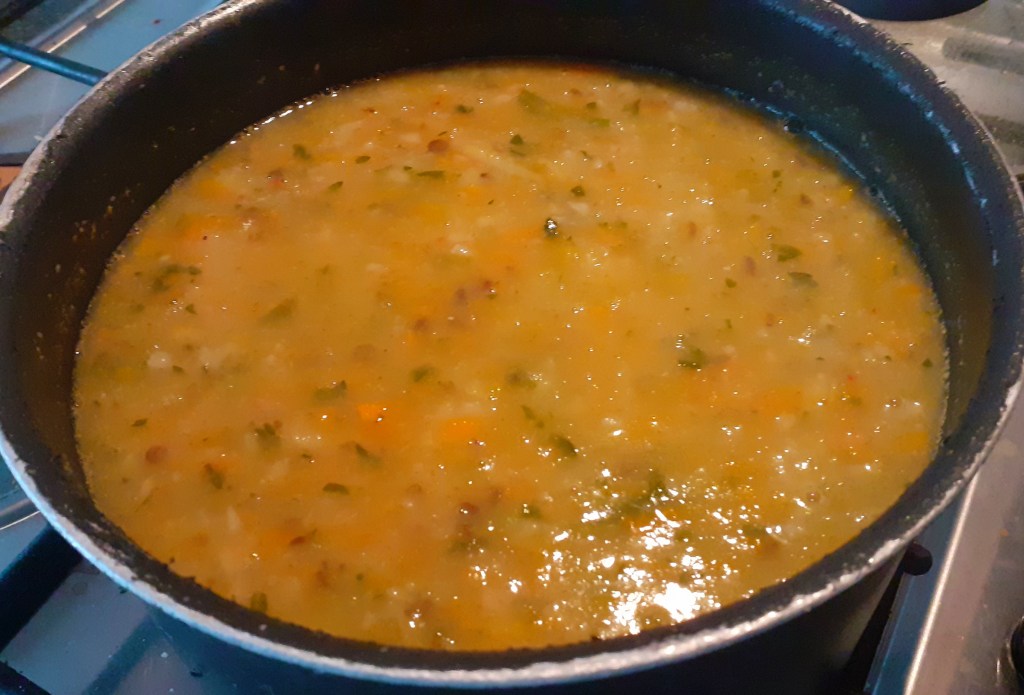
Today’s crop from the local community farm had soup written all over it – turnip, swede, carrots, potatoes and a handful of flatleaf parsley. I added onion and celery, and defrosted 1 litre of chicken stock from a previous Sunday roast. Throw in around 100g of pea and barley soup mix and simmer for 40 mins. Plunge in the handheld blender for a few blitzes to give it just the right consistency. Served with a loaf of sourdough for dipping, and eaten (again) al fresco.
This harvest of fresh, natural ingredients made enough for two hearty servings, with about 3 – 4 left over. Soup-ermassive! Earlier in the day I had been lying in the warm sun listening to Muse’s Black Holes and Revelations album on my headphones, so it seems apt to add this latest track to the ADK Playlist. Take it away, Muse.
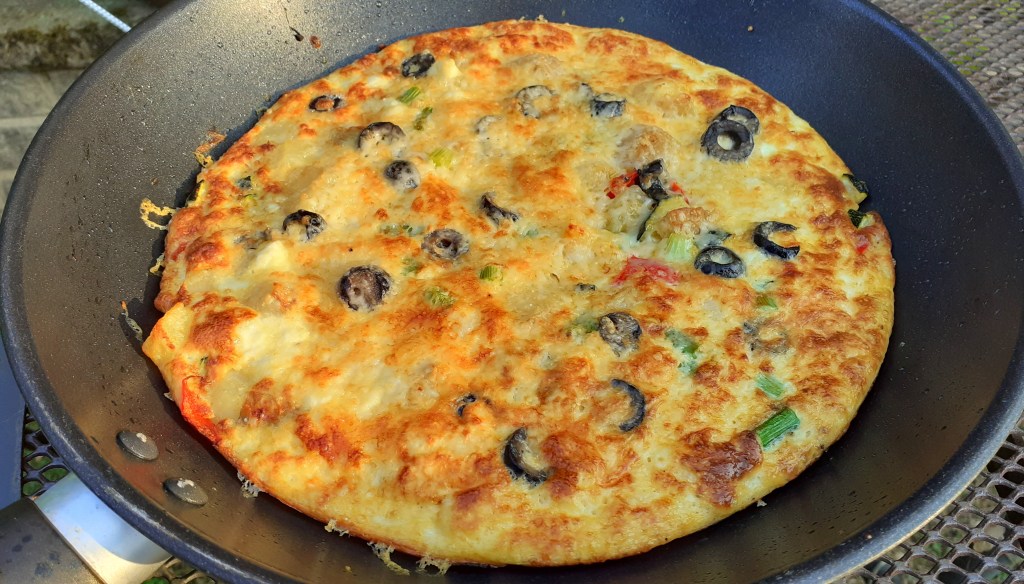
Well, that’s a good description of how it’s felt this last few days in the UK heatwave. After lots of no-cook meals and salads recently, the temperature in the kitchen finally subsided sufficiently, so that we could contemplate turning the cooker back on again.
It had to be something quick, however, so as not to undo the good work of the increasingly refreshing afternoon breeze coming across the back garden. Cue the classic midweek standby – the omelette. This one had a Spanish feel to it, using up some leftover Jersey new potatoes (from the potato salads), half a sweet red pepper and a few chopped black olives. I mixed in the rest of a dish of ricotta with the eggs, chopped fresh spring onions from the garden and some grated cheddar. Served up with seasonal freshly picked steamed green veg on the side – on this occasion french beans, mange tout and broad beans.
Eaten al fresco to stay cool. And speaking of staying cool, let’s add some Roxy Music to the ADK Playlist:
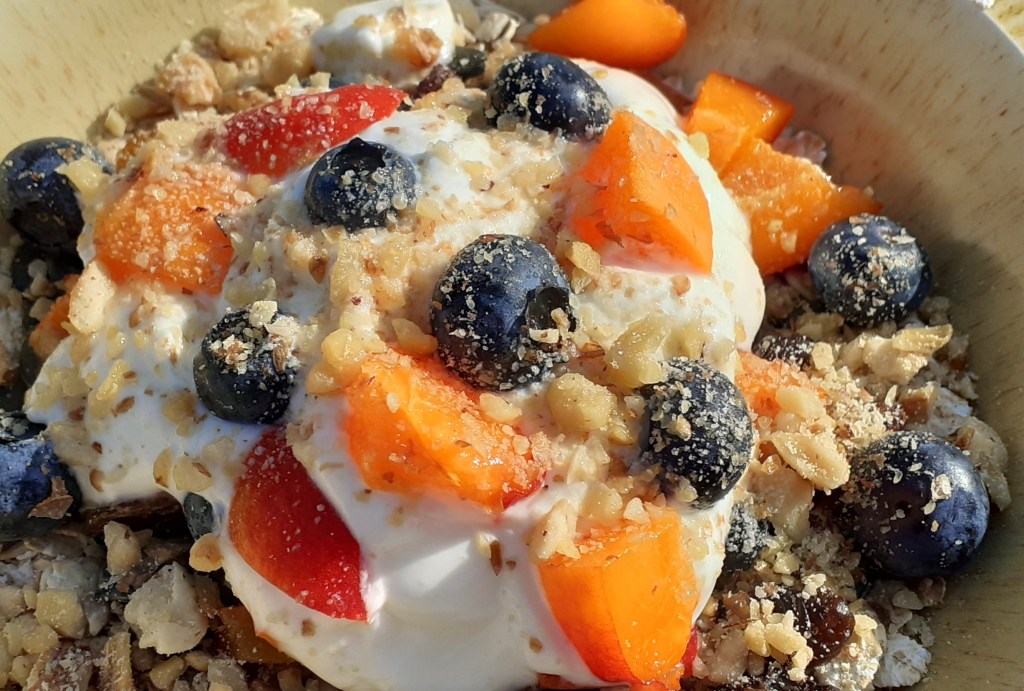
This breakfast dish looks and tastes great – the bright blue and orange combination making for a lively, satisfying and healthy start to your day.
Servings
Makes one bowl for immediate consumption!
Timings
5 mins to prepare
You Will Need
4 – 5 dessert spoonfuls of rolled oats
1 dessert spoonful of pumpkin seeds
1 dessert spoonful of sunflower seeds
1 dessert spoonful of mixed dried fruit
a handful of fresh blueberries
1 fresh apricot, chopped
a few dessert spoonfuls of natural yoghurt
1 dessert spoonful of chopped nuts
Method
Combine all the ingredients, other than the yoghurt and nuts, in a breakfast bowl. Reserve 2 – 3 blueberries and apricot pieces.
Top with the yoghurt, sprinkle over the chopped nuts, and add the reserved blueberries and apricot to garnish. Enjoy.
Customise It!
Keep to the core ingredients of oats, seeds, fruit and nuts, otherwise swap in whatever is fresh and seasonal or whatever you have to hand. Raspberries or strawberries work well, and later in the summer I will be using freshly picked blackberries. Add milk in place of yoghurt, and add a swirl of honey if that’s your thing.
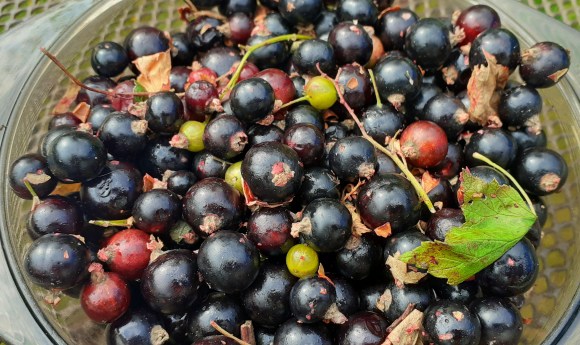
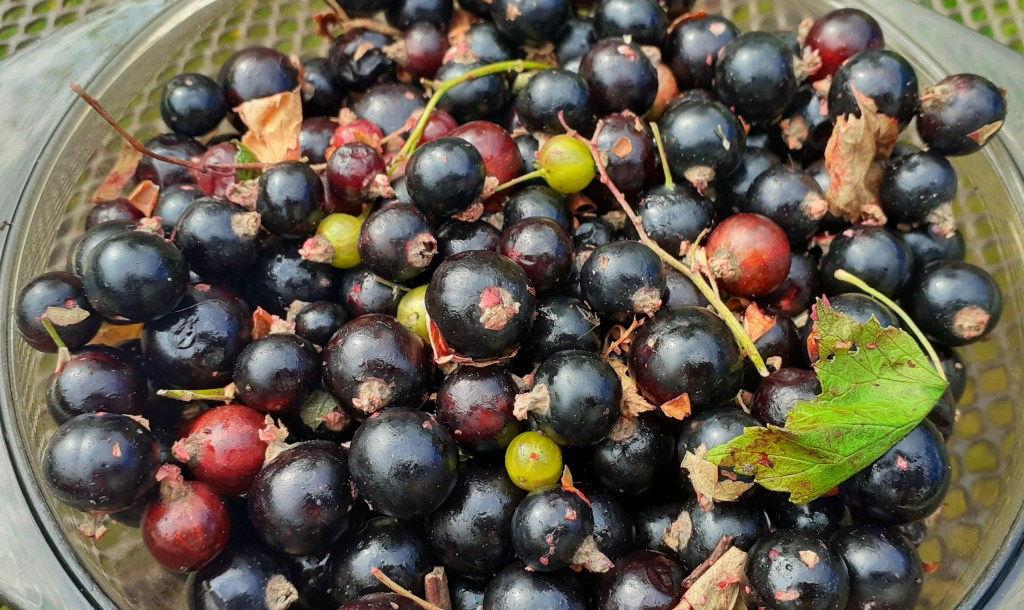
Delighted to have picked up this crop of fresh blackcurrants from our local community farm. As we’re currently bracing ourselves for the hottest day of the year here in the UK, I’ve decided to make some cooling blackcurrant ice cream with my Cuisinart ice cream maker, so am currently investigating recipes. All helpful ideas and suggestions welcome! Watch this space for a post later this week about the finished article.
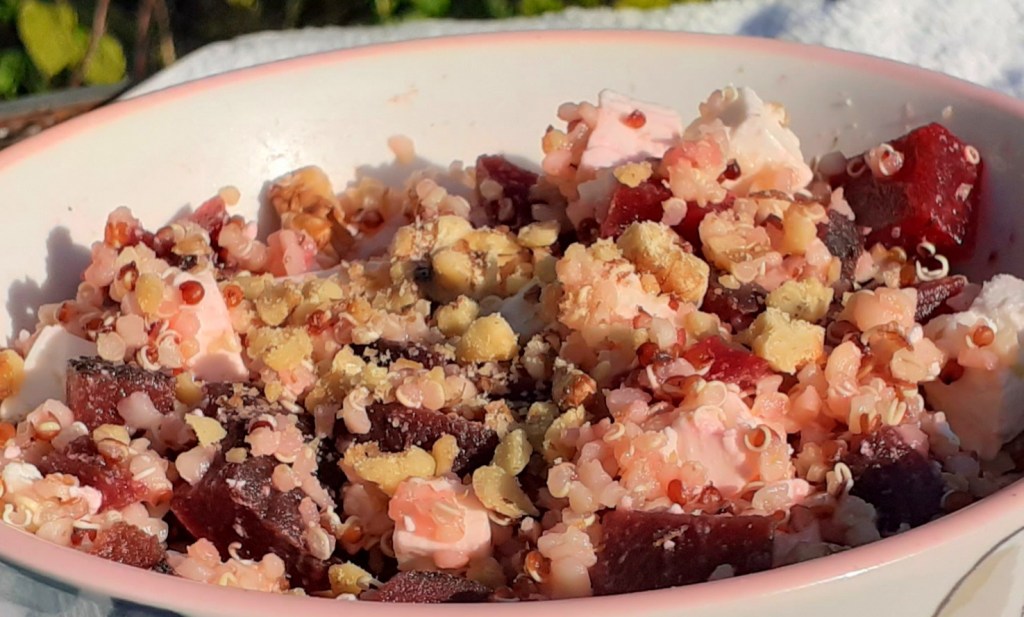
This deliciously tasty side salad combines beetroot with feta cheese and chopped toasted walnuts, along with a mix of bulgar wheat and quinoa. The beetroot naturally colours the feta and gives the whole dish a pinkish hue.
Servings
Serving this as a side to a main should be sufficient for 2 – 4 people.
You Will Need
60g mix of bulgar wheat and quinoa
240ml water
one cooked beetroot
100g feta cheese
50g walnuts
Method
Put the bulgar/quinoa mix in a saucepan with the water and bring to the boil. Once boiling, reduce to a simmer and leave for about 25 mins. Turn off, drain and rinse in a sieve under cold running water.
Dice the beetroot and the feta.
Toast the walnuts in the oven at 180C for 5 – 10 mins, then roughly chop in the food processor with blade fixed.
Combine the ingredients in a bowl and give them a swirl with a fork, fluffing up the bulgar/quinoa as you go. The juice from the beetroot should naturally infuse the salad with a pink glow.
Customise it!
You can omit the nuts if they’re not your thing. Replace with something green and small, like chopped fresh spring onions. You could also swap the bulgar/quinoa with couscous or even rice, if that’s what you prefer (or have in the cupboard!)
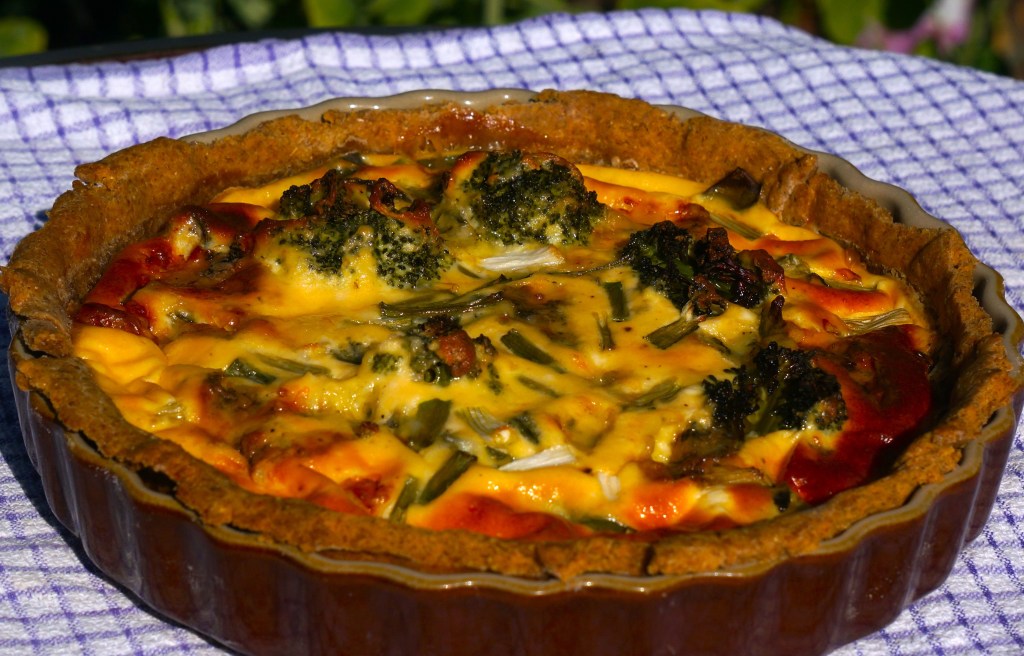
Summer green vegetables are reaching their peak just now, and this quiche brings out the best in them. Fetch a crop from the garden or market stall, and mix with creamy ricotta and salty blue cheese in this fresh and vibrant quiche.
Servings
Makes 4 generous slices, or 6-8 average ones!
Timings
About 15 mins initially to prepare the pastry, and another 15 mins to prepare the filling including steaming the veg. Baking time is an initial 10 minutes for the case alone, then 45-50 mins for the filled quiche.
You Will Need
For the pastry
115g plain flour
115g wholemeal flour
100g soft margarine
a pinch of seasalt
a pinch of paprika
a few drops of cold water
For the filling
Approx 180g fresh green veg (I used broccoli, french beans, runner beans and mange tout)
about 3 spring onions
3 large eggs
130g ricotta cheese
50g stilton cheese
twist of black pepper
Method
Grease a 20cm flan dish with some margarine or spread. I like to line the base with a circle of greaseproof paper in addition, as I find it helps to remove the quiche once baked.
Make the pastry by sieving the two flours into a food processor fixed with blade, along with the margarine cut into cubes. Pulse until it resembles fine breadcrumbs. Add a few drops of water and pulse again until you have a ball of pastry whirling around the blade. Take it out, pat into a ball and wrap in clingfilm, placing it in the fridge to stay cool.
Prepare the veg. Trim the ends off the beans and cut into 2-3cm lengths. Trim the ends of the mange tout, and cut any leaves and tough stalks off the broccoli.
Put the veg into a steamer over boiling water for about 10 mins.
While the veg is steaming, turn on the oven and set to 180C. Take the pastry from the fridge and roll out with a rolling pin to a size that will fit the flan dish. Carefully place it into the dish. Leave any pieces overhanging at the edges for the moment. Prick the base with a fork in 5 or 6 places. Place it back in the fridge while the oven is getting up to temperature.
Remove the veg from the steamer and drain in a colander. Set on one side.
With the oven up to temperature, remove the pastry dish from the fridge. Crumple a square of greaseproof paper with your hands and place it in the dish. Fill the paper with baking beans, spreading them out with your fingers so they cover the whole of the base and are gently pressed up to the sides. Place in the oven for 10 mins.
While the pastry base is baking, top and tail the spring onions and cut into 2-3cm lengths. Chop the stilton roughly into cubes. It will crumble a bit as you do.
Mix the eggs and ricotta in a jug, and give it a few twists of black pepper.
Remove the pastry dish from the oven and carefully lift the paper and baking beans into a separate bowl to cool. Don’t worry too much about any pastry overhanging the edges – it will drop off as it bakes, either at this stage or the next one.
Spread the steamed veg across the pastry base, and crumble the stilton over it. Carefully pour the egg and ricotta mix into the pastry base, making sure it gets into all the little cavities between the veg. Dot over the chopped spring onions, making sure they are lightly pushed into the mixture so they don’t burn.
Bake in the oven, still at 180C, for about 45 – 50 minutes. The mixture should have risen and the top should be slightly browned. Remove and leave to cool in the dish.
When cool, chop into slices and serve!
Customise it!
Main opportunity for going freestyle here is in the choice of veg. Sticking broadly to the theme of seasonal green/garden veg, you can use whatever you have to hand – perhaps introduce some greens, spinach, kale or chard. Herbs will also go well. Any combination should work, but keep it to a total of around 180g so as not to overfill.
You can also use any other crumbly blue cheese in place of stilton e.g. Dorset Blue Vinney. If you’re short of time, or don’t want to bother making the pastry, then you can use some ready made shortcrust pastry.