Categories
Recipes Snacks

Smoked Paprika Popcorn

This week I’ve been looking to make a snack to enjoy while watching this weekend’s Superbowl. I always stay up for the game, even though it starts at around 11.30pm UK time, and continues into the early hours.

This year’s should be a particularly good match-up – the Philadelphia Eagles have had an outstanding season, but will face their toughest challenge yet against the Kansas City Chiefs. Even though the Chiefs have the talented Patrick Mahomes as quarterback, I’m predicting that the Eagles will be just too strong overall, and will take home the trophy. We shall soon see if I am right!

As it’s Superbowl weekend, I’m keen that my snack should follow an American theme. I also want it to be savoury, that can be enjoyed alongside a cold drink while watching the game.

This has led me to popcorn, a classic American snack. It’s a food that sometimes gets a bad press online, typically for being served smothered in refined sugar and hydrogenated fats, in large cardboard buckets and consumed in dark multiplex cinemas. Even in the home, microwave-ready popcorn also comes in for some criticism with concerns over chemicals used in its packaging.

However, as I am sure my lovely American foodie followers will point out, popping corn, prepared properly, is essentially a healthy snack! As a grain, it is high in fibre, low in calories and a good source of antioxidants.

So why not have a go at making some? It is inexpensive, quick and easy. I bought a 500g bag of popping corn in Sainsbury’s for £1.45, meaning the portion size below costs about 15p (or 18 cents) to make.

The smoked paprika drizzle ingredients are minimal, and cooking it from scratch means that you are in complete control over what and how much is added. This means it can be enjoyed as a relatively healthy snack. It is suitable for both vegetarians and vegans.

Will you be following the Superbowl? Feel free to leave any comments you wish at the foot of this post. Enjoy the popcorn, and enjoy the game!

Servings

This will make around 50g of popcorn, enough for two people as a Superbowl snack. If you’re expecting guests, especially hungry, or if the game goes into Overtime, just make extra!

Timings

10 mins to make in total (see, I told you it was quick).

You Will Need

  • 2 tbsp extra virgin olive oil
  • 50g popping maize corn
  • sea salt flakes
  • half to 1 tsp smoked paprika

Method

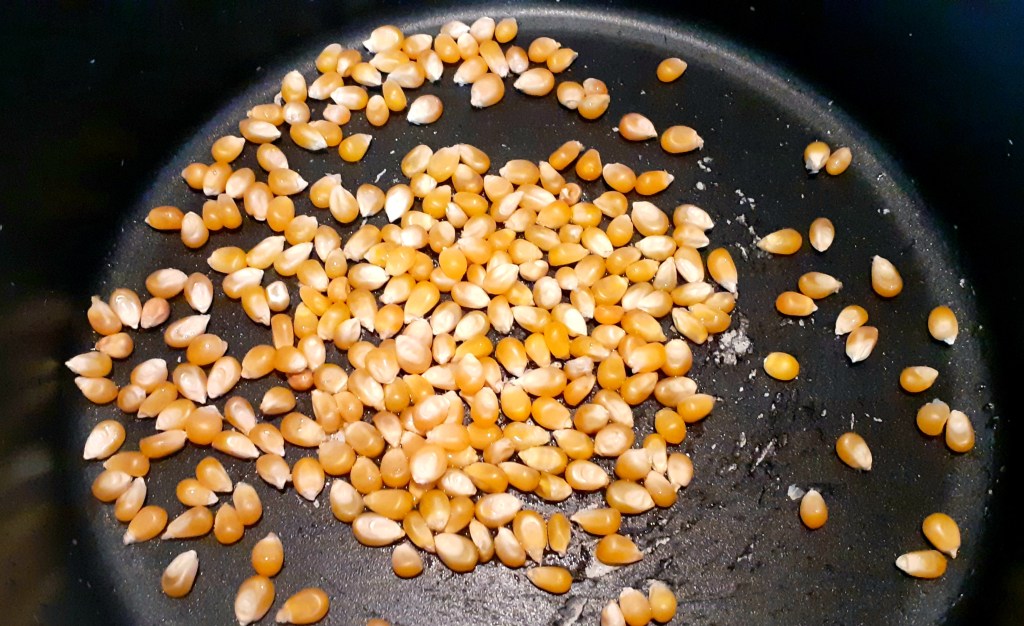
  1. Put a heat under a heavy pan with tight-fitting lid. Add in 1 tbsp of the oil and the golden corn. Spread the corn in a single layer across the bottom of the pan (see photo above).
  2. After a minute, pick up the pan and hold down the lid. Give it a good shake to ensure all the corn is coated in the oil. I actually do this a few times during the cooking process. Just make sure to keep that lid tight on the pan while doing so!
  3. After another few minutes, it will all start kicking off. The corn will begin to pop and bits will be pinging off the lid and walls of the pan. A drop of moisture inside each corn kernel causes it to explode when heated, making it jump around (hence the reason for the tight fitting lid).
  4. There are usually a few kernels that don’t pop, and the ones that have popped will toast nicely in the hot pan. After a few minutes the popping will slow down, and you can remove the pan from the heat.
  5. Pause for a moment to enjoy the delicious aroma of cooked and popped corn that will just have filled your kitchen.
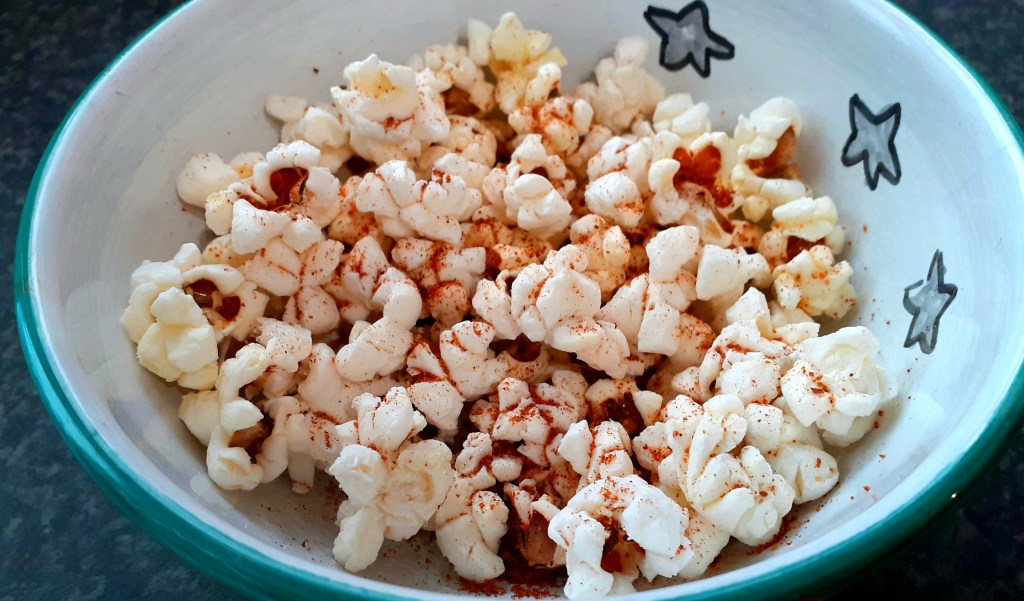
  6. Tip the popcorn into a large sharing bowl and, while it is still warm, drizzle over the second tbsp of oil. Sprinkle over the sea salt and the smoked paprika. Give it a good stir so that all the corn gets coated.
  7. Finally, taste and add further seasalt or paprika, if required.
  8. Take the bowl (which should resemble my main photo at the top of this post) with your cold drink of choice, and retire to the TV room to enjoy the Superbowl.

Next track for the ADK Spotify Playlist is also Superbowl-inspired. It’s Rihanna’s turn to headline the Half Time Show this year. With no rain forecast for Arizona this Sunday, I wonder if she will still be bringing along her Umbrella? Let’s hope so!

Categories
Bakes Recipes

The Perfect Lamington

During my travels here in Australia, I have become quite partial to the Lamington. Typically enjoyed with a coffee, it seems to be something of a national treasure, and is on sale in bakeries and cafes everywhere we go.

Essentially it is a square-shaped sponge cake, coated in chocolate icing with a generous sprinkling of desiccated coconut. A simple, and unbeatable combination!

The story goes that it was invented in Queensland, Australia in around 1900 by the chef to the State Governor, Lord Lamington. I understand that New Zealanders have also laid claim to it’s creation, but the Aussies seem to be having none of that!

There are some variations. The ones in my main photo introduce another ingredient – a layer of raspberry jam in the middle – which works really well. There is even a bakery in Sydney that has developed glamingtons, with flavours including strawberry, salted caramel and peanut butter. The original choc and coconut combo remains the most popular, however.

Australia Day (the national holiday) is coming up on 26 January, and one of the ways that people will be celebrating is by baking and eating Lamingtons. These ones, adorned with national flags, I spotted in a bakery today in Brighton, a resort just down the coast from Melbourne.

Here is another variation for Australia Day – a Lamington style Victoria sponge filled with fresh cream.

Can’t be bad!

Fancy joining in?

Servings

This will make around 16 cakes.

Timings

20 mins to prep, 20 mins in the oven. Once cooled, 10 mins to coat in the icing.

You Will Need:

  • metal baking tray, 24cm square (or equivalent)
  • 125g sugar
  • 50g butter, softened, plus 1 tbsp for the icing
  • 2 eggs
  • 120g self-raising flour
  • 85g desiccated coconut
  • 2 tbsp cocoa
  • 150g icing sugar
  • 3 tbsp boiling water
  • 1 tbsp butter
  • some smooth raspberry jam (optional)

Method

  1. Heat the oven to 180C.
  2. Grease and line the metal baking tray with baking paper.
  3. Cream the sugar and softened butter together in a mixer. Whisk in the eggs and combine, then add in the self-raising flour.
  4. Pour the batter into the baking tray and spread out evenly with a knife or spatula. Bake for 20 mins.
  5. Cool on a baking tray, then cut into squares.
  6. If you wish to add a layer of jam, do so at this stage – slice each square and spread it in, making a jam sandwich.
  7. For the chocolate coating, mix the cocoa, icing sugar, boiling water and tbsp butter. Give it a good stir so it forms a nice, thick sauce.
  8. Put the desiccated coconut in a separate bowl, alongside.
  9. One at a time, place each sponge square on a fork and dunk it in the choc sauce. Use a spoon to coat the top and sides, then set it in the coconut, gently turning it over so that all sides are coated.
  10. Leave on a wire rack and allow 10 – 15 mins to set, before serving.

Customise it!

As indicated above, bakers across Australia have come up with a number of very creative variations. If, like me, this is the first time you’ve made Lamingtons, I would stick to the basic recipe. With all the dunking in choc sauce and coconut, this has the potential to become quite messy. My advice is to learn to walk before you run!

I mentioned earlier that we had visited Brighton today. For my final photo, I will share with you this shot from Brighton Beach, looking back towards the Melbourne city skyline. I liked the contrast between the small town seaside resort, with a line of little coloured beach huts on the right, and the mighty CBD behind. It was another hot one today, reaching 30C, and we joined the many people cooling off in the sea.

Time to add another Australian band to the ADK Playlist. I discovered The Presets, an electronic duo from Sydney, on a visit to Melbourne’s Australian Centre for the Moving Image. This track is called My People.

Categories
Blog

Hala Doha

This week I’ve arrived in the Middle East with my two sons, on my way to spending the winter months in Australia.

Doha, in Qatar, is a real mixture of the old and the new. My main photo shows the old – represented by a traditional wooden dhow boat used for pearl diving when the place was just a small coastal village – alongside the modern day skyscrapers of West Bay. The discovery of oil – and enough supplies of it for the next 200 years – has brought significant wealth and transformed the place out of all recognition.

My search to discover the local cuisine has led to a variety of cafes and restaurants specialising in food mainly from other parts of Asia. As the city has grown, it seems that people have travelled here to work, bringing their own tastes and styles of cooking with them. Consequently, many restaurants have sprouted up to use their skills and satisfy their appetites.

These next photos show a banquet we enjoyed in a Korean Restaurant. The appetiser comprises pickled root veg, kimchi (fermented cabbage and veg) and spiced cubes of tofu.

There are four dishes in the mains: pieces of chicken coated in spicy batter and deep fried; spiced tofu and beef in a doubenjiang (chilli bean) sauce, with a mound of steamed rice; bibimbap, which is fine sliced, marinaded (bulgogi) beef served with fried egg, veg and rice; and chicken and veg in sweet soy sauce.

The mix of tastes was amazing. I especially liked the variety of things they do with tofu – the complimentary starter was a bowl of soup with cubes of tofu in. In fact, the restaurant was actually called The Tofu House, in the Al Mansoura district where we are staying. This has given me lots of ideas for when I am next back in the ADK Kitchen, though that won’t be until well into 2023!

It was also very reasonably priced – 140 QAR for three, which works out about £10 per head. It is certainly possible to eat well and inexpensively in Qatar.

It’s an interesting time to be in Qatar, as the country is hosting the Football World Cup. There are people here from all over the world, making it easy to chat to friendly visitors from Canada, Japan, Egypt, Uganda, India and many, many more, as well as locals, particularly on the excellent, state of the art public transport system. It shows the power of international sport to bring people together and overcome any language or cultural barriers.

Choice of music for the ADK playlist is something from my listening on the way out here with Qatar Airways – Little Fluffy Clouds from The Orb reminds me of a comfortable and enjoyable 6 hour flight!

Categories
Mains Recipes

Parmesan Kohlrabi Steaks

Kohlrabi is a great vegetable to cook with. It has a texture that’s been described as a cross between a turnip and a water chestnut, which sounds about right.

Quite often you will see it in recipes that treat it like the poor relation – consigned to the margins of a meal, as a side dish, or have it grated into a salad along with other ingredients.

I felt it deserved its place in the spotlight, so this dish sees it firmly centre stage (or should that be centre plate?) as the star attraction. The crisp, juicy and crunchy texture it retains when cooked makes it suitable as a main, especially for anyone on a vegetarian, vegan or plant-based diet. I hope you will find it lives up to its billing!

It is actually quite simple to make. Cut a large disc-shaped slice of the kohlrabi that is about 1 – 2cm in thickness from the widest point (the equator, if you know what I mean). Trim off the peel, then cut it into about 6 pieces. Go for irregular shapes – you want each steak to be individual and the whole dish not to look uniform. Also, work in a number of angles and corners – these will crisp and caramelise as they roast.

Briefly place the steaks in a shallow pan with a little oil. Fry each steak on both sides for about 2 – 3 mins, then transfer to a roasting dish and place in the oven, heated to 180C. Let them roast for 30 mins, flipping them over half-way through.

Remove the dish from the oven and grate 40g of parmesan cheese (or vegan alternative if desired) over the steaks. Place back in the oven for a further 10 mins and let the cheese melt. The steaks will be browning up nicely as the photo below shows (I couldn’t resist a sneak peek in the oven to see how they were doing).

When complete, remove and serve with your choice of accompaniment. In my main photo you can see that I served this with savoury rice and steamed carrots. I served 3 steaks in one serving, making this a meal for 2.

If you like, you can make more servings, or have it again on another occasion, as you will only have used a fraction of that beautiful kohlrabi.

This is an exciting weekend for me, as I am setting off on my travels, spending the next couple of months in Australia, with some time in the Middle-East en route. I’ll be blogging here and tweeting (@differentkitch) along the way, so do please follow me on my journey. I welcome any comments and suggestions on places to visit and eat, food and drink I should try. This lovely track about global travel – Ramblin’ Man from Lemon Jelly – seems particularly appropriate today!

Categories
Mains Recipes

Sweet Potato, Kale and Chorizo Hash

This is a great midweek meal when the nights are closing in, and a dish that I find irresistible! I love the smell and crackle of the chorizo as it sizzles in the pan, and the vivid, contrasting colours. The bright orange of the sweet potato, and freshly picked green kale from the garden, combine to make this autumn on a plate.

Servings

This is a meal for two.

Timings

15 – 20 mins to prepare.

You Will Need

  • 400g sweet potatoes, peeled and chopped into chunks
  • 20g butter
  • about 80g fresh kale (for me this was 8 or 9 leaves)
  • 1 onion
  • 1 red pepper
  • 100g chorizo
  • 400g can of chopped tomatoes

Method

  1. Put the sweet potato chunks in a saucepan and bring to the boil. Reduce to a simmer for 15 mins.
  2. Chop the kale leaves into strips and place in a steamer over the saucepan. They will soften in the steam from the sweet potatoes as they cook.
  3. Separately, in a frying pan, add the onion and red pepper, chopped, along with slices of the chorizo. There is no need to add any oil or spices, as the chorizo will provide all the oil and flavouring you need.
  4. After 5 mins, add the chopped tomatoes to the frying pan and stir in.
  5. When the sweet potato has cooked, drain it and mash with the butter. Add it to the frying pan, along with the steamed kale.
  6. Give it all a good stir in the frying pan and turn up the heat. Turn the mixture over a few times with a broad spatula – you should try to get some parts of the hash crisped and browned. Serve when it has reached a level of charred-ness that suits your tastes!

Customise It!

Stick to the core of sweet potato, kale and chorizo, but beyond this add in other veg you like. Garden peas or sweetcorn would be fine, for example.

You can use any good chorizo sausage. The one I used is a British-made variety from the Cotswold Curer (see photo). I picked this up at Warwick Food Market when I was in the West Midlands for the Commonwealth Games, back in the summer.

Whatever chorizo you use, remember this is a hash – switch up the heat, get that spatula in there and make sections of it nice and crisp by flipping over and over.

Just like my favourite track from Hot Chip – the latest addition to the ADK Spotify Playlist:

Categories
Bakes Desserts Recipes

Coffee and Walnut Cake

It’s a great pleasure to introduce our latest guest post this week on A Different Kitchen. My good friend, and master baker, Kelvin, shares with us his recipe for Coffee and Walnut Cake. He has treated me to a slice of this and I can confirm it is delicious, with a creamy coffee coating and a walnut crunch.

Hi, this is a cake that I have made a few times now. It has always been very popular with my family, and I have developed it to take account of their feedback. In particular, I have added more coffee cream filling to coat the top and sides of the cake (not just the middle), and more walnuts. This latest version was well-received at my wife’s birthday party recently. My little 3 year-old grand-daughter liked it a lot, having a second slice and asking for me to make her next birthday cake. A satisfied customer indeed!

Timings

15 mins to prepare, and around 40 mins to bake.

Servings

I used a 24cm diameter size baking tin, enough for around 16 generous slices.

You Will Need

For the Cake

  • 225g softened butter
  • 225g caster sugar
  • 4 eggs
  • 275g self-raising flour
  • 1 teaspoon (tsp) baking powder
  • 4 tablespoons (tbs) milk
  • 2 tsp vanilla essence
  • 80g walnuts (chopped)
  • 1 tbs instant coffee granules with 1 tbs boiled water

For the Filling

  • 150g softened butter
  • 400g icing sugar (sifted through a mesh sieve)
  • 4tsp milk
  • 2tsp instant coffee granules with 2tsp boiled water
  • 50g walnuts halved for decorating the top of the cake.

Method

For the Cake

  1. Grease cake tin with a thin layer of butter and pre-heat a fan oven to 160C.
  2. Beat the eggs well in a cake bowl until fluffy. Add butter, sugar, finely chopped walnuts, flour, baking powder, milk and vanilla essence. Dissolve the coffee granules in the boiled water, and add to the bowl once cooled. Mix well.
  3. Spread mixture evenly into the cake tin.
  4. Bake until ready in oven for 30/40 mins. Check to make sure it is no longer moist inside.

For the Filling

  1. Beat softened butter and gently add filtered icing sugar (and when all icing sugar added) add milk. Dissolve the coffee granules in 2tsp water, and add when cooled. Beat together until smooth.
  2. After the cake has cooled, cut it into half. Inside one half thinly spread filling. Place other half on top and cover with the remainder of the filling and around the sides (as shown in the photo).  
  3. Finish by decorating halved walnuts over icing on top of cake.
  4. Keep in the fridge to harden the icing.
  5. Take out of the fridge 30 mins before serving.
  6. Slices can be frozen to retain freshness.

My choice of musical track for adding to Kevin’s ADK Playlist is The Sounds of Silence by Simon and Garfunkel. I particularly like this version, recorded live. The wonderful harmonies, the lyrics and the simple accompaniment on acoustic guitar combine to make this a favourite song of mine.

Categories
Mains Recipes

Root Veg Curry

Continuing the recent theme of cooking with autumn vegetables, this dish brings together a variety of seasonal root veg in a subtle yet spicy curry that is suitable for both vegetarians and vegans. My meal, shown in the photo, used celeriac, mooli (or white radish), kohl rabi, carrot and parsnip, though other veg are available!

Servings

This will make enough to serve four.

Timings

10 mins to peel and chop the root veg, and 30 mins to roast. The rest of the prep can be done while the veg is roasting. Allow 10 mins more to combine and finalise.

You Will Need

  • a baking tray full of root vegetables, peeled and chopped into chunks. I used celeriac, mooli (white radish), kohl rabi, carrot and parsnip
  • oil to drizzle
  • 1 medium onion
  • 1 garlic clove, crushed
  • 1 fresh chilli, or 1 tsp chilli powder
  • 1 tsp cumin seeds
  • 1 tsp garam masala
  • 1 tsp nigella seeds
  • 500g passata
  • bunch of fresh coriander
  • 400ml can of coconut milk
  • rice to serve

Method

  1. Drizzle oil over the tray of chunked root veg and roast in the oven at 180C for 30 mins.
  2. While the veg is roasting, heat some oil in a saucepan and toss in the garlic and spices until sizzling. Then add in the onion.
  3. After a few minutes, add in the passata, Hold the bunch of coriander over the pan and, with scissors, cut in a generous amount.
  4. Let the passata and coriander cook for a few minutes.
  5. Add in the coconut milk and stir to combine. Cook for a further 5 – 10 mins. It will reduce slightly to give a thick, spicy sauce.
  6. When the root veg is roasted, scrape it into the saucepan and stir in.
  7. Serve with boiled rice.

Customise it!

Lots of scope to vary the veg. Butternut and other squash will work well in the roasting tray, also some chestnut mushrooms or peppers. Adjust the strength of the chilli and spices to suit your taste.

For musical choice, I have gone for a favourite track of mine, which also serves as an homage to the good people at our local community farm who harvest these lovely root vegetables from the soil – Can You Dig It by The Mock Turtles.

Categories
Mains Recipes

Autumn Veg Roast

The signs of autumn are now all around us. I’ve been enjoying some beautiful wooded walks amidst glorious shades of red and orange leaves. The days are getting cooler, and this coming weekend, in the UK, our clocks will be going back one hour, bringing in earlier, darker evenings.

This dish was inspired by the arrival in the ADK Kitchen of a wonderful harvest of autumn vegetables from our local community farm. You can see these spread out in the photo below: butternut squash, another (as yet unidentified!) variety of squash, parsnip, carrots, onions, celeriac and mooli (white radish). Also included in the crop was some broccoli, green beans and fresh butter beans.

There was too much to use in one dish, so I focused on the squashes and root veg, which I think are lovely roasted. I added a tomato and onion sauce, with a maverick ingredient – black olives. It is topped with a crisp crust of wholemeal breadcrumbs, grated cheese and chopped nuts.

The next photo shows the finished article, warm from the oven. Served with a nice glass of red wine, it makes a great comforting meal on an autumn evening, now that the nights are drawing in.

Timings

10 mins to prepare and chop the veg, which then roasts for 30 mins. The rest of the prep you can do while the veg are roasting. Allow a further 20 mins for the assembled dish to roast further.

Servings

This will serve 6 people.

You Will Need

  • A pyrex dish-ful of chopped seasonal veg: I used butternut squash, celeriac, parsnip and mooli, and added some chestnut mushrooms and red pepper
  • A sprinkling of herbes de provence
  • Some olive oil
  • A 500g carton of tomato passata
  • 1 onion
  • 1 clove of garlic
  • 75 g pitted black olives, whole or chopped
  • 5 or 6 slices of wholemeal bread chopped into crumbs
  • 75g grated cheddar cheese
  • 75g chopped mixed nuts

Method

  1. Chop enough veg to half fill the pyrex dish that you will use. The veg should be in chunks roughly about 2-3cm square. Tip them into a separate metal baking dish and sprinkle with the herbes de provence. Drizzle with olive oil and roast in the oven for 30 mins at 180C. Spread them so that they are in a single layer, and use a second metal dish if necessary.
  2. While the veg is roasting, chop the onion and add it to some hot olive oil in a saucepan, with the garlic clove, crushed. After a few minutes, tip in the passata and black olives, and mix. Let it bubble for around 10 mins so that it is slightly thickened in consistency.
  3. Separately, combine the breadcrumbs, grated cheese and chopped nuts in a bowl. Get your hands in there and give it all a good mix. You want the cheese to be intertwined with the other ingredients so that, when it melts, it will bind it all together into a crisp coating.
  4. When the veg has roasted, combine it with the tomato sauce, and pour into the pyrex dish. Pat it all down with the back of a spatula so there are no gaps.
  5. Sprinkle over the bread, cheese and nut crust, evening it out and patting it down with the backs of your fingers. Give it a final drizzle of olive oil.
  6. Cook in the oven for around 20 mins, or until the top is crisp and golden. With some ovens, it may help to give it a final 5 mins under the grill to crisp it up. Serve.

Customise it!

Lots of scope for customising here, starting with choice of veg. Really, you can use whatever is in season and whatever particular veg you prefer. There are many varieties of squash and root veg around this time of year, most of which benefits from roasting, helping it sweeten and caramelise on the outside and succulent to bite into.

With the crust topping, you can use other bread for the crumbs, and other cheese. Grated blue cheese would give it a lovely taste twist, as would some parmesan. The next time I make this I will include some pumpkin and sunflower seeds in the crusty mix.

You can omit the olives if they’re not your thing. I love them, and had the idea to include them in the sauce and serve the dish with a warmed, sliced black olive ciabatta (see my photo), which all worked really well.

The dish is suitable for vegetarians. To make it vegan, simply omit the grated cheese, though the topping will be a little looser. However, you could always use a vegan cheese. As ever, feel free to experiment!

This time of year also means that Halloween is approaching. I’ll be saying more about this in this coming weekend’s post, and hopefully having a little fun. For now, I’ll choose a track from a Halloween Playlist I have on Spotify, to share as musical accompaniment.

Cue Superstition by Stevie Wonder. Nothing more to say!

Categories
Desserts Recipes

Passion Fruit and Lime Pots

I made these recently to share with friends as a dessert after a dinner party. They look good, taste fresh and tangy with a hint of sweet and sour, are a little different from the norm, and not that difficult to make. They can also be prepared well in advance of mealtime. It is a Mary Berry recipe originally, so thanks to Mary for the inspiration!

My recent photo post on Twitter for this dish received a new record number of likes for A Different Kitchen, so I’m sharing the full recipe here.

Timings

20 mins to prepare, at least two hours to set in the fridge.

Servings

This will make six pots.

You Will Need

  • 6 passion fruits
  • juice of 1 lime
  • 600ml double cream
  • 100g caster sugar

Method

  1. Tip the cream and sugar into a saucepan. Heat and stir until the sugar has dissolved, then step up the heat and boil for 3 minutes. Remove from the heat.
  2. Halve 5 of the passion fruits and scoop out the juice and seeds. Whirl the juice and seeds in a food processor with blade fitted, until smooth. Push through a sieve so that you have a smooth juice, and discard the seeds.
  3. Add the passion fruit juice to the warm cream and sugar mixture, so that the cream will start to thicken.
  4. Add the lime juice also to the mixture, and stir in so that it thickens further.
  5. Pour the mixture into six ramekins and let cool. Once cooled, place in the fridge to set for at least 3 hours.
  6. When ready to serve, cut the remaining passion fruit in half and scoop out the juice and seeds. Scatter this across the surface of the 6 pots, and serve.

The musical accompaniment to this dish should be smooth, mellow and sophisticated, with just a hint of an edge to reflect the combination of sweet and sour. I’ve opted for a band getting a lot of play recently in the ADK kitchen, and that is Massive Attack, here with the excellent vocals of Tracey Thorn. Enjoy Protection.

Categories
Bakes Desserts Recipes

Austrian Apple Cake

It’s a great pleasure to introduce our latest guest post this week on A Different Kitchen. My good friend, and accomplished cook, Eva, shares with us an old family recipe from her native Austria. Eva treated me to a generous slice of this recently (see my photos) and it was delicious!

Hi, this is an old family recipe of mine from Austria, where I grew up. It’s special to me as it reminds me of my childhood. Mum used to make this cake for when we had friends round for coffee. It’s a recipe that was passed down from one of her aunts to my Mum. Also, this is a typical Austrian “fruit cake” where you use the fruits according to the season, especially plums, apricots, pears or cherries.

Ingredients

160g unsalted butter

160g sugar

160g self raising flour

3 eggs

Zest of half a lemon

2-3 spoons of dark rum

3 cooking or dessert apples

Flaked almonds

Icing sugar for dusting

Method

Beat butter, sugar and egg yolks in a bowl until fluffy and pale in colour. Add the lemon zest and rum, then add the flour. Whisk the egg whites till fairly stiff and fold into the mixture. Put the cake mixture into a baking tin. I used a spring form cake tin of 23cm diameter. Then peel the apples and cut into thin slices and arrange them on top of the cake. Sprinkle with flaked almonds and bake in the oven at 180C (fan oven) for about 45 minutes.

Finish with a dusting of icing sugar before serving!

My choice of musical track for adding to Kevin’s ADK Playlist is the “Hallelujah Chorus” from the Messiah by Georg Friedrich Händel. I sung this piece many years ago when I first joined a choir in this country and thoroughly enjoyed it then. Many years later and with a different choir I sung it again at Winchester Cathedral, which was so special and one of my best moments in life. I find the Messiah totally exhilarating and uplifting which makes it one of my favourite pieces.