Categories
Bakes Recipes

Banana, Walnut & Dark Choc Muffins

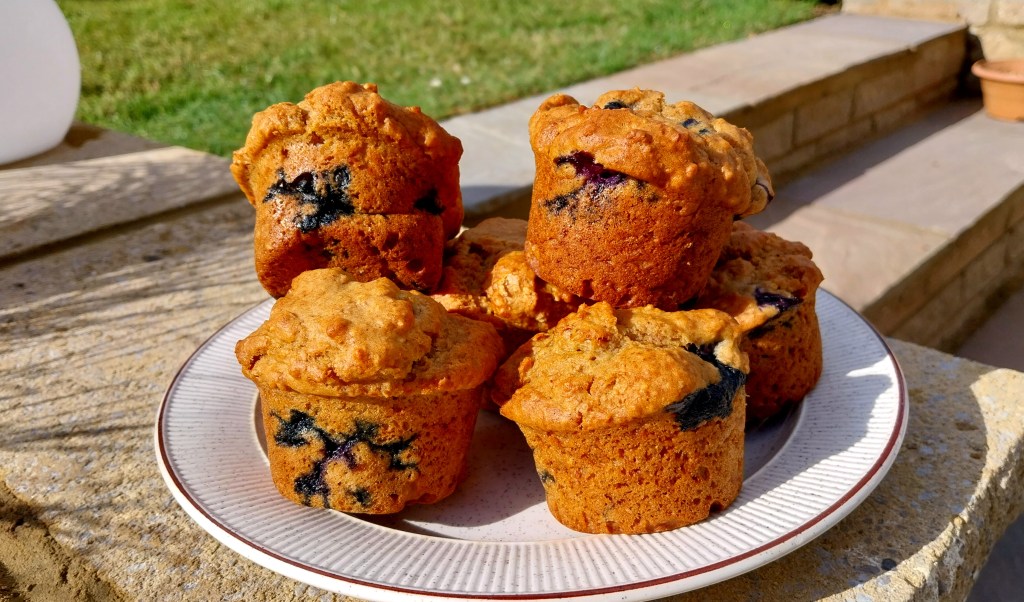
This week I’ve tried changing up a banana muffin recipe a little by introducing some different tastes.

I replaced about a fifth of the flour with oats, and used nearly half and half plain and wholemeal flour for the rest. I toasted some walnuts and then chopped them in the food pro, adding the pieces in with broken up shards of 70% dark chocolate. The final twist was to reduce the sugar by about a quarter, so that all those added ingredients can actually be tasted in the final muffin, rather than being drowned out by sweetness.

I’m pleased with the results and will bake these again. Apart from making for an interesting blend of flavours, the changes also mean less reliance on refined carbs and a higher score on protein, fibre and omega 3.

So you can genuinely feel good about yourself while scoffing these muffins 🙂

Servings

Makes 12 muffins.

Timings

About 10 mins to prepare, and 20 mins in the oven at 160C.

You Will Need:

  • 120g plain flour
  • 100g wholemeal flour
  • 1 tsp baking powder
  • 1 tsp bicarb of soda
  • 1/2 tsp salt
  • 60g walnuts, toasted and then chopped
  • 40g 70% dark choc, broken into pieces
  • 2 well ripened bananas
  • 90g caster sugar
  • 1 egg
  • 60g oats
  • 90ml semi-skimmed milk
  • 90ml veg oil

Method

  1. Turn on the oven to warm up to 160C. Prepare a muffin tin or mould,
  2. Sieve the flours, baking powder, bicarb and salt into a large bowl. Stir in the nuts and chocolate.
  3. In a separate bowl, mash the bananas and add in the egg, followed by the sugar, milk and oil. Stir in the oats and leave to soak for a few mins.
  4. When the oven is up to temp, pour the wet mix of ingredients into the dry, and stir so that there are no dry ingredients showing. Spoon into the tin or mould and bake for 20 mins or until browned to your desired level.
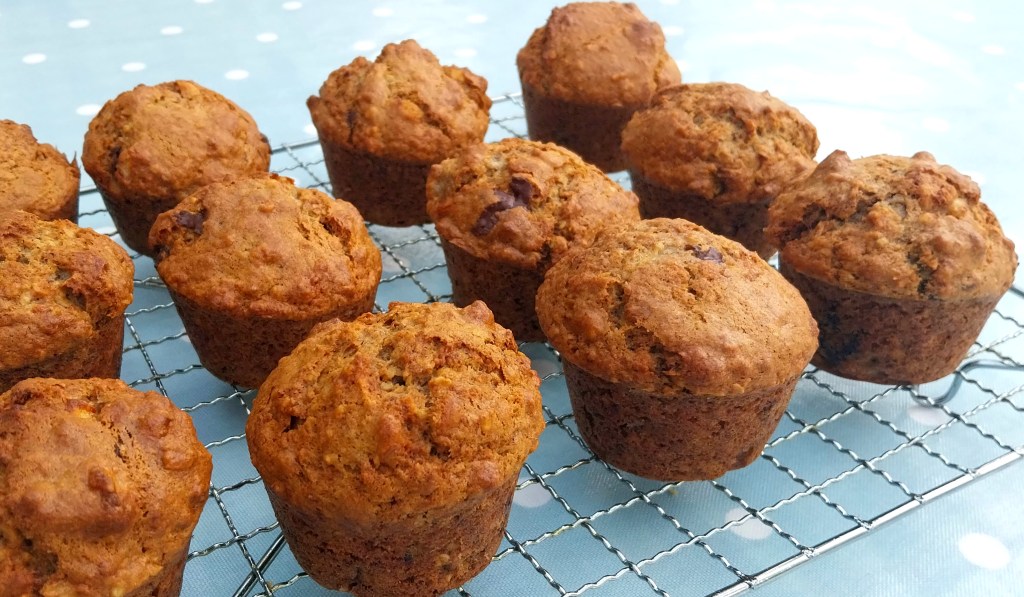
  5. Remove from the oven and, after 5 – 10 mins, remove the muffins to a wire rack to cool (as shown in my photo at the top of the post).

Customise It!

I chose walnuts as they work well with banana, but you could just as easily use almonds, hazelnuts or pecans if you wish. Whatever nut you choose, toasting it for 5 mins in the oven helps bring out its natural taste.

This week I’ve been listening to 90’s band, Mansun who hail from Chester. This is a great track, so I’m adding it to the ADK Playlist: Wide Open Space. Enjoy (with your muffin).

Categories
Blog Desserts

Baba au Rhum

Of all the pastries we have enjoyed on our current holiday in France (and there have been a few 🙂 ), the one consistently rated the highest in our party has been the Baba au Rhum, or Rum Baba.

This eastern European delicacy was reinvented in Paris in the early 19th Century. The story goes that a cake that had become a little dry was enlivened by a little soaking in some rum.

Since then patisseries all over France have never looked back. Fast forward 200 years and this is the scene in our local boulangerie here in the Dordogne. Amidst a range of to-die-for pastries sits a line of Baba au Rhum.

As you can see, the Baba is served with its own pipette already inserted into the cake. The pipette is filled with rum, which is injected into the sponge before eating, by carefully squeezing the pipette with one’s fingers. It makes a dessert that is light, moist and boozy, topped off with a swirl of whipped cream. Mmm!

The Rum Baba has had some stiff competition from the patisseries we have frequented this week, see below.

Or maybe check out this selection..

Every one a piece of culinary artwork that it is very difficult to fault. In such company, it is saying a lot that the Baba au Rhum has been rated so highly by our group.

Formidable!

I can’t say whether the cake inspired LCD Soundsystem to record this track, but it’s a song I really like, so here it is: New Body Rhumba.

Categories
Bakes Recipes

New Forest Buttermilk Scones

Mmm….freshly baked buttermilk scones with butter and home made plum and apple jam. Yes!

This week I found myself with a tub of buttermilk to spare. The by-product of an exercise in making butter from Jersey cream, I was vaguely aware that it could be used in baking scones.

A little further research taught me that its acidity makes it react well with bicarbonate of soda to give a light texture to baking. It also brings a slightly sour, but pleasant taste to a scone mix.

I decided to give it a go, thinking that the scones would make a tasty picnic lunch the following day, when we had planned to go cycling in the New Forest. A remote national park that has changed very little over the decades, the Forest has an extensive network of tracks exclusively for non-vehicle traffic – just walkers, cyclists and horseriders.

And so it worked out! My photos show the plate of golden brown scones, as we prepared to devour them after a morning’s cycle in the peace and solitude of the Forest. Look carefully in the background and you can see some of those famous wild ponies that roam the New Forest.

Just make sure you eat the scones before those ponies do 🙂

Servings

This made 12 scones and, with a couple of re-rolls of the remaining scone mix, another 2 – 3 on top.

Timings

15 mins to make, 20 mins in the oven at 160C.

You Will Need

  • 450g self-raising flour, plus extra for dusting
  • 1/2 tsp salt
  • 100g butter or baking spread
  • 85g caster sugar
  • 300ml buttermilk
  • 1 tsp vanilla extract
  • a splash of milk for basting

Method

  1. Switch on the oven to 160C. Sieve the flour into a large bowl with the salt. Add in the butter or spread in cubes or small pieces, and mix with an electric whisk until it has the consistency of breadcrumbs.
  2. Tip in the sugar and whisk again to mix in.
  3. Warm the buttermilk and vanilla in a saucepan on the hob for 2 – 3 mins. Then gradually add it in waves to the flour mix, turning over with a spatula after each addition to mix it in. Keep going until all the buttermilk has been incorporated, and a cohesive scone mix has formed in the bowl.
  4. Tip the mix out on to a well-floured surface. If the mix is still a little too wet to work with, don’t be afraid to sprinkle over more self-raising flour until it has a consistency that can be pressed and moulded with the fingers, and rolled out to around 2cm thickness.
  5. Press a scone or biscuit cutter into the mix to produce rounds – mine are around 7cm diameter, and this gave me enough for 12 scones. Re-roll the leftover mix and this should give you another 2 – 3.
  6. Place on a metal tray lined with baking paper. Brush each with a little milk on a pastry brush and bake for 20mins at 160C.
  7. Remove and place on a wire rack to cool.
  8. Serve with butter or spread and jam. We had ours with home made plum and apple jam, as shown in my photo at the top of the post. The scones are best eaten within a day.

Customise it!

If you can’t get your hands on buttermilk, I have read that adding 1 tbsp of lemon juice to ordinary dairy milk can be a useful substitute.

The colour of the scones reminded me of this track, so I have been playing it this week. I don’t think The Stranglers intended the song to be about making scones, or cycling amongst the ponies in the New Forest, for that matter. Never mind – here they are with Golden Brown.

Categories
Bakes Recipes Snacks

Anzac Biscuits

Anzac Biscuits are a traditional Australian sweet treat that I enjoyed on my recent travels there.

The story goes that they became popular with Australian and New Zealand Army Corps (ANZAC) soldiers in the First World War, since when they have been adopted as one of the nation’s most popular foods.

Picking up a genuine recipe (from the Aussie supermarket chain, Coles) before I left, I made a batch of the oaty, coconutty, slightly chewy delights this week, as shown in my photo above. I am very pleased with how they turned out, so I’m sharing the recipe here.

Servings

This will make 24 biscuits.

Timings

15 mins to prepare, and 20 mins in the oven at 180C.

You Will Need

  • 150g plain flour
  • 80g desiccated coconut
  • 90g rolled oats
  • 110g caster sugar
  • 55g brown sugar
  • 125g butter
  • 2 tbsp golden syrup
  • 1 and 1/2 tbsp boiling water
  • 1/2 tsp bicarb of soda

Method

  1. Switch the oven on to 180C. Line a couple of baking trays with baking paper.
  2. Put the flour, coconut, oats and sugars in a bowl, and stir to mix.
  3. Place the butter and golden syrup in a saucepan over a low heat. Stir until the butter is melted, then leave to cool.
  4. Combine water and bicarb in a bowl, then add to the flour/oats, along with the butter mixture. Stir to combine.
  5. Pick off 1 tbsp-sized portions of the biscuit mixture and roll into a ball between the palms. Place on the baking trays, equally spaced so that they have room to spread out as they melt. Flatten the tops slightly with your hand.
  6. Place in the oven for 15 mins or until baked to your liking.
  7. Once baked, let cool on the baking tray for a few moments, before transferring to a wire rack to cool.

Customise it!

If you like your biscuits particularly chewy, try reducing the brown sugar and replacing it with caster sugar. To make them crunchier, step down the caster sugar and increase the brown sugar.

From classic Australian baking to classic Australian punk. Here are Brisbane’s The Saints from back in the day, with (I’m) Stranded.

Categories
Bakes Desserts Recipes

Lemon & Blueberry Ricotta Muffins

Today’s bake recipe features muffins with a healthy dose of Sicilian style.

Ricotta is used widely in Italian cuisine, for everything from pastries to pasta sauces. It is made from whey, the watery by-product of other cheeses, such as mozzarella. High in protein and calcium, it is slightly lower in fat than many other cheeses.

It adds a silkiness to the texture of this muffin mix, working well with the tartness of the lemon zest and the sweetness of the bursting berries.

Buon appetito!

Servings

Enough here for 12 generous muffins.

Timings

10 mins to prepare, 20 mins to bake in the oven at 160C.

You Will Need

  • 200g plain flour
  • 80g wholemeal flour
  • 1 tsp baking powder
  • 1 tsp bicarb of soda
  • 1/2 tsp salt
  • 140g fresh blueberries
  • 1 egg
  • 120ml milk
  • 90ml veg oil
  • 110g light muscovado sugar
  • zest of 1 lemon
  • 250g ricotta cheese

Method

  1. Turn the oven on to 160C. Prepare a muffin tin or mould.
  2. Sieve the flours, baking powder, bicarb and salt into a bowl, and stir to mix.
  3. Add in the blueberries and stir so they are coated in flour.
  4. Crack the egg into a separate bowl, and add the milk with the veg oil. Stir in the sugar, lemon zest and ricotta.
  5. When the oven is up to temp, pour the contents of the second bowl into the first, and stir to combine.
  6. Spoon the mixture into the tray or mould, and bake in the oven at 160C for 20 mins.
  7. Remove and leave to cool on a wire rack, before devouring.

Customise It!

Ricotta is readily available in shops, but if you can’t locate it or wish to switch it up, greek style natural yoghurt or cottage cheese could be used instead. Feel free to chuck some poppy seeds into the mix to add further visual interest, and a little extra crunch.

I’ve used a mixture of plain and wholemeal flour, as I am currently experimenting with using more wholemeal in baking. However, you can use all plain flour if you wish. I’m also trying to use muscovado more in baking, but you can use caster sugar if that’s what you have available.

I have no doubt that Paul Weller and Mick Talbot would approve of a little Italian style, so let’s add this track to the ADK Playlist: The Style Council with Shout to the Top.

Categories
Bakes Recipes Snacks

Cheddar and Scallion Savoury Muffins

Today’s bake has the look and texture of a muffin with the taste of a savoury scone. If, like me, you adore the heavenly flavour of cheese and onion, you’ll love these savoury muffins made with grated mature cheddar cheese and fresh chopped scallions (spring onions). They contain much less sugar than sweet muffins, and are suitable for vegetarians.

What’s not to like?

Servings

Makes 12 savoury muffins.

Timings

10 mins to prepare, 25 mins to bake at 160C.

You Will Need

  • 255g plain flour
  • 3 tsp baking powder
  • 1/2 tsp salt
  • 3 tbsp caster sugar
  • 60g mature cheddar cheese, grated, plus extra for topping
  • 3 scallions, finely chopped.
  • 1 egg
  • 240ml milk
  • 90ml vegetable oil

Method

  1. Turn the oven on to 160C. Prepare a muffin tin or mould.
  2. Sieve the flour, baking powder, salt and sugar into one bowl, and stir to mix. Add in the cheddar and scallions, stirring again to ensure the scallions are coated in the flour.
  3. In a second bowl, combine the egg, milk and veg oil.
  4. When the oven is up to temp, pour the contents of the second bowl into the first. Stir until fully combined, then spoon the mixture evenly into the tray or mould.
  5. Place in the heated oven. After about 15 mins, take from the oven and sprinkle the grated cheese topping over each muffin. Place back in the oven for a further 10 mins, until risen and the cheese topping is lightly browned.
  6. Place on a wire rack to cool, then enjoy!

Customise it!

Mature cheddar works well as it is strong tasting, but you can experiment with other cheeses if you wish. You could also include some nuts or seeds in the sprinkled topping.

I’ve been quietly pleased with how good these taste, and the fact they can be easily transported for picnics and as snacks on the go. This means I will probably be trying further variations on savoury muffins – I reckon on giving chilli a go, and possibly a vegemite option in honour of my recent Australian travels. Watch this space!

Music this week comes from the recent match-up between Manchester legends Liam Gallagher (Oasis) and John Squire (Stone Roses). I had downloaded their album and listened to it on my travels back from Australia. This is probably my favourite track, with the kind of 60’s British pop-influenced chorus you might expect from these two: Mars to Liverpool.

Categories
Recipes Snacks

Peanut Butter, Oat & Apricot Bites

Having made my Peanut Butter Boosters recently, I found myself with half a jar of good quality peanut butter left. I wanted to come up with another bite-sized temptation to fill the annoying hunger gap that can open up after exercise, or simply when the next mealtime is still a little way away.

These fit the bill. What’s more, they don’t require any cooking and are very quick to make. There are only 5 ingredients, so you stay in control of exactly what is going into the snack. They are both vegetarian and vegan.

The best part however, is that making them requires the squidge technique i.e. getting your hands into the baking bowl and manipulating the mix with your fingers. Why is that the best bit? Well, when you’ve finished shaping the Bites, your reward is getting to lick your fingers clean. Mmm!

Convinced? Then give this a try…

Servings

Depending on your preferred size, this mix will make around 9 -10 Bites.

Timings

15 mins max to make, after which they are ready to eat. Keep them in the fridge and they’ll last for 2 – 3 days (if they’re not all eaten by then, that is 🙂 ).

You Will Need

  • 120g oats
  • 120g peanut butter
  • 60g maple syrup or runny honey
  • 40g dried apricots, finely chopped
  • a few splashes of milk (dairy or non-dairy)

Method

  1. Combine all the ingredients in a bowl, and squidge together between your fingers till you have a sticky mix.
  2. Pull off a piece of your desired size and roll into a ball between the palms of both hands. Set on a plate, and repeat till all the mixture is used up.
  3. Place in the fridge.
  4. Enjoy licking your fingers!

Customise It!

You could swap in another dried fruit for the apricots if you wish – dates would go well. Chuck in a handful of seeds if you like.

I’ve carried on listening to The 1975 this past week – their music is very uplifting and it reminds me of a great night in Birmingham with my friend – see The 1975. Here’s another track I particularly like, therefore: The Sound.

Categories
Bakes Recipes Snacks

Peanut Butter Boosters

Here’s a wholesome and nutritious, home-made alternative to those commercially-produced cereal bars we often reach for, to cure the hunger pangs between meals. I wanted to see if I could create a version that gave greater control over the ingredients and, in particular, the carb and sugar levels.

The words ‘peanut butter’ are enough to bring a smile to most faces, so I decided to put that centre stage. I used a make that consists of 100% peanuts, with no palm oil (Meridian).

Taking inspiration from a recipe by Hugh Fearnley-Whittingstall, I also cut out all flour and eggs, and brought in oats, seeds and honey. I used muscovado sugar instead of the refined variety, and reduced the amount of it by about a third from what is often found in sweet recipes.

The challenge with removing a number of staple ingredients from a bake is finding a mixture that holds together, and doesn’t descend into crumbs. The consistency of the peanut butter and the stickiness of the honey definitely helped with this, as did letting it cool completely in the tin, before cutting into slices.

The resulting booster bars do hold together – see my main photo above. They’re also vegetarian and vegan. They aren’t completely crumb-free, but that’s a small price to pay for having a box full of these tasty and nutritious boosters to plug that hunger gap.

And if you do get some crumbs – hey, just gather them up and sprinkle them over your breakfast cereal – they’re delicious!

Servings

16 booster bars.

Timings

15 mins to prepare, 30 mins to bake at 180C.

You Will Need:

  • 125g vegetable baking spread
  • 80g light muscovado sugar
  • 125g peanut butter
  • 75g runny honey
  • zest of 1 orange
  • zest of 1 lemon
  • 200g oats
  • 100g dried apricots, finely chopped
  • 120g mixed seeds e.g. pumpkin, sunflower.

Method

  1. Grease and line a traybake tin – mine used is 20 cm square. Switch on the oven to 180C.
  2. Place the spread, brown sugar, peanut butter and honey in a saucepan and warm over a gentle heat. Stir until it melts into a thick mixture.
  3. Add in the other ingredients and stir well to combine.
  4. Tip into the prepared tin and level with a spoon. Place in the oven for 30 mins.
  5. Remove from the oven and let cool completely in the tin. Turn out carefully and cut into 16 squares.

Customise It!

Swap in other dried fruit for the apricot. The real nut fiends can swap in some different varieties of chopped nuts (e.g, pecans) for some of the seeds, if you wish. Do what’s necessary to give you the tasty energy boost you need.

This week in the ADK Kitchen I’ve been playing the new release by The Black Keys, a band from Ohio that I really like and who’ve already provided several tracks for the ADK Playlist. With all that energy from the Peanut Butter Boosters, this new track should have you up on your feet, singing and dancing along with its catchy chorus: Beautiful People (Stay High).

Categories
Bakes Recipes

Upside Down

This Valentine’s Day, here’s a cake you’ll love.

Pineapple Upside Down Cake is a tantalising dish. All the while it’s baking, it conceals its secret, exotic ingredient. Peeking into the oven is of no avail, as the enigmatic fruit that makes it special is shielded from view, laying at the base of the tin like buried treasure. Then, when the baking is done, it’s fun to invert it and reveal all those juicy pineapple chunks.

This one is made with a fresh pineapple, mixed with a sprinkle of dark muscovado sugar. The muscovado combines with the juice to give the cake a rich sweetness and a treacly, marbled appearance (as with the slice of cake shown in my photo above).

Servings

16 servings.

Timings

15 mins to prepare and 30 mins to bake at 180C.

You Will Need

  • 1 fresh pineapple
  • 165g self-raising flour
  • 165g caster sugar
  • 165g unsalted butter or spread
  • 3 eggs
  • 1 tsp baking powder
  • 1 tbsp dark muscovado sugar

Method

  1. Grease and line a baking tin. Mine is 22cm square. Switch on the oven at 180C.
  2. Peel and core the pineapple, and cut the flesh into roughly 1 – 2cm chunks.
  3. Put the flour, caster sugar, butter/spread, eggs and baking powder into a bowl. Mix with an electric whisk till it is all combined.
  4. Arrange the pineapple chunks over the bottom of the baking tin. Sprinkle over the dark muscovado sugar.
  5. Pour the cake mixture over the top. Place in the oven for 30 mins or until a skewer inserted in the middle comes out clear. Remove from the oven.
  6. Invert the cake from the tin on to a wire rack (so that it is now upside down), and allow to cool before cutting into slices. Serve upside down, with the pineapple showing, on its own or with some greek yoghurt alongside.

Customise It!

Most published recipes for this cake seem to use tinned pineapple. I think it is nice to use the fresh article, seeing as it is so readily available in our shops these days. However, you can substitute the tinned version here, if you’re in a rush and don’t want to peel, core and chop a fresh pineapple.

A classy dessert like this deserves an equally classy track for the ADK playlist. Here’s Diana Ross with (what else?) Upside Down.

Categories
Bakes Recipes

Blueberry & Coconut Crumble Squares

Here’s a delicious tray bake that thinks it’s a fruit crumble. A cup full of the oaty, dark sugary, coconutty cake mix is removed before the eggs are added, and then spread over a top layer of juicy blueberries before baking. The result is a cake base with a fruit crumble topping.

Enjoy it warm or cold, on its own or with a dollop of custard or greek yoghurt alongside.

Inspiration for this post has come from BBC Good Food. It’s another variation on a favourite traybake of mine that I posted previously on A Different Kitchen. In this version I’ve changed the sugar from light brown to dark brown, and swapped in blueberries for blackberries. It demonstrates again how easy it is to play around with recipes, rather than feeling we have to strictly follow them to the letter!

Servings

Makes 16 squares.

Timings

15 mins to prepare, 25 mins to bake at 180C.

You Will Need

  • 250g self-raising flour
  • 25g oats
  • 250g dark brown sugar
  • 200g butter or spread
  • 75g desiccated coconut
  • 2 eggs
  • 300g fresh blueberries

Method

  1. Grease a baking tin and line with baking paper. The one I used is 22cm square.
  2. Sieve the flour into a large bowl. Stir in the oats and sugar.
  3. Add the baking spread and mix in with an electric whisk, until you have a crumbly mixture.
  4. Take a teacup or sugar bowl and fill it with some of the mix. Set aside.
  5. Add the eggs to the large bowl and whisk in once more until it is all combined.
  6. Spread over the bottom of the baking tin, and smooth out towards all four corners. Scatter the blueberries on top, then sprinkle over the reserved teacup/sugar bowl of crumble mixture.
  7. Place in the oven for 25 mins, or until a skewer inserted in the middle comes out with no mixture sticking. Leave to cool.
  8. When cool, remove from the tin and cut into 16 squares.

Customise It!

Other fruit like raspberries will work well if you wish. Swap in light brown sugar for the dark if you want a lighter cake. Chuck a few chopped nuts or seeds in with the reserved mixture to add further texture to the crumble topping.

This week I’ve been following developments about the current musical collaboration between two legends of the Manchester music scene – John Squire (The Stone Roses) and Liam Gallagher (Oasis). So far they have only released a couple of tracks for streaming, and I am looking forward to hearing the whole album when it comes out next month. John Squire’s distinctive swiping guitar sound and Liam’s rasping vocals have the potential to make this something special.

It’s prompted me to listen to tracks by The Stone Roses this week. Their sound is an engaging mash-up of 60’s-era vocals and late-80’s dance. This is probably my favourite track of theirs, so I’m adding it to the ADK Playlist. It showcases the Roses at their best: choppy lead guitar, bouncy drums and percussion, steady bass and understated vocals: The Stone Roses with What the World is Waiting For.