Categories
Bakes Blog Snacks

Selkirk Bannock

Until recently, I had never heard of the Selkirk Bannock. That’s all changed since a friend of the family brought us one back as a gift from a holiday in the Scottish Borders. Delicious it is, too!

According to legend, Queen Victoria visited Sir Walter Scott’s granddaughter at Abbotsford in 1867, and was served a Selkirk Bannock made by local baker Robbie Douglas. As a result the Bannock became famous and fashionable throughout Scotland, and is still made today to Robbie’s original recipe.

A rich but lightly textured fruit loaf packed with sultanas, my first impression was the malty, slightly sticky soft crust giving off a scent of scotch whisky. According to the ingredients list, however, there is no whisky included in the mix.

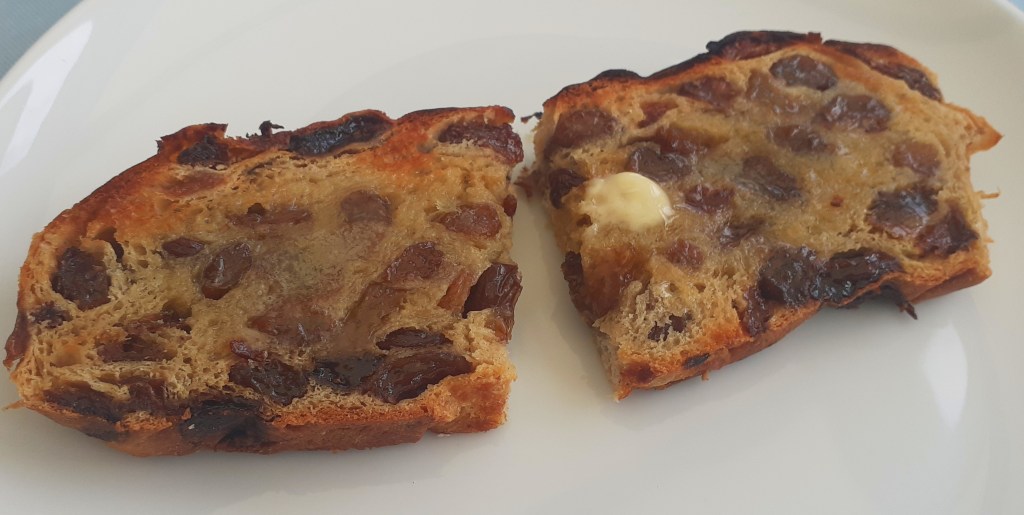
It is eaten simply – sliced and spread with butter. Toast it and let the butter melt (see my photo), and it is even more delicious.

It fully deserves its place in Scotland’s great culinary tradition.

Accordingly, for musical inspiration, I’ve chosen a modern day anthem from Scottish duo Craig and Charlie Reid, better known as the Proclaimers. I was amused to read recently that an interviewer once asked Craig and Charlie how they first met (eh, they are identical twins).

I know how challenging it can be to meet my daily target of 10,000 steps. Maybe, however, with a good few slices of Selkirk Bannock with butter in me for sustenance, I too could manage 500 miles?


Categories
Mains Recipes

Bomb the Basa

Basa is still a relative newcomer to our fishmonger stalls and markets. Being a good source of protein, rich in healthy omega 3 fats, and coming from a plentiful and sustainable supply, it certainly deserves our attention alongside the more traditional cods and herrings. You could even say it has earned its plaice (sorry, couldn’t resist that one). Being quite inexpensive and available in many supermarkets also helps.

I’ve cooked with it a few times and found that it tends to stay firm, holding its texture and shape where some other types of fish are more likely to fragment into flakes. This means it is quite receptive to marinades and toppings that add complementary tastes.

Servings

This will make a meal for two.

Timings

10 mins to prepare, 25 mins in the oven.

You Will Need

  • 2 basa fillets
  • 1 garlic clove
  • 2-3 cm piece of root ginger
  • 1 small green chilli
  • 1 small red chilli
  • half a lemon
  • olive oil
  • black pepper

Method

  1. Line a baking tray with foil and brush it with a little of the oil. This will ensure that you can remove the fish after cooking, to serve in one piece!
  2. Lay the 2 fillets on the foil. Top with finely chopped garlic, ginger and chillis. Splash on the lemon juice and a drizzle of oil, with a few twists of pepper.
  3. Cook in the oven at 180C for about 25 mins.

Customise it!

Stick with the holy trinity of garlic, ginger and chillis, but if you want to add some chopped spring onions that would be fine also. Fresh coriander (cilantro) would be excellent.

If you like fish with a buttery sauce, you could make up some of the lime and sea salt butter I made on this earlier post (see here, step 9) and melt some over the fish as you serve it. The lime and sea salt will work well with the chilli and ginger.

I served this with some new potatoes and steamed green veg, as the picture shows. I imagine it would also be really good with some stir fried veg or noodles, and a spicy sauce.

There are other Basa recipes around, but you will do well to beat this. Or, should I say, Beat Dis!

It’s an honour to add Bomb the Bass to the ADK Spotify Playlist.

Keep this frequency clear!

Categories
Bakes Recipes

Blackberry, Oat & Yoghurt Muffins

The end of summer/start of autumn is a great time of year for fresh blackberries. You may find them in supermarkets and farm shops, and some farms will let you pick your own. Best of all though is that they grow plentifully in the wild in hedges in public places and country parks, and can usually be picked free of charge.

Nutritionists will say that they are good for our overall health in various ways, such as being a source of Vitamin C and antioxidants, which protect our body cells.

I recently went on a walk to pick some in a nearby country park. I have included a photo of my haul of two filled plastic containers. My Fitbit told me afterwards that I had earned 52 active zone minutes from the exercise, which shows how blackberries can be good for our health in more ways than one!

There are many ways to use blackberries. A favourite of mine is as a topping on muesli.

I have also used them recently in a blackberry, coconut and almond traybake.

Probably my favourite though is the muffins, shown in my main photo, where they are combined with rolled oats and natural yoghurt, The muffins can be enjoyed for breakfast, as a lunchtime snack, a picnic dessert, or indeed at any time.

Servings

Ths will make 12 muffins.

Timings

15 mins to make, 25 mins in the oven at 180C.

You Will Need

  • 200g plain flour
  • 1 and a half tsp baking powder
  • half tsp salt
  • 85g rolled oats
  • 240 ml natural yoghurt
  • 1 tsp bicarbonate of soda
  • 1 egg, beaten
  • 120g light brown sugar
  • 90ml milk
  • 90ml vegetable oil
  • 140g fresh blackberries

Method

  1. Preheat the oven to 180C and prepare a muffin tray/container. I use a flexible silicone plastic mould that requires no greasing. This makes it especially easy to pop out the muffins when they are baked.
  2. Wash and dry the fresh blackberries. Lay them on a dish.
  3. Weigh out the flour and sprinkle a few tablespoons over the blackberries, turning them so they are coated in the flour. This will help stop them sinking to the bottom of the muffin mixture as they are baking.
  4. Mix together the rest of the flour, baking powder and salt in a bowl.
  5. In a separate bowl, stir together the oats, yoghurt and bicarb of soda. Let this stand for a minute, then add the beaten egg, sugar, milk and veg oil.
  6. Pour the oat/yoghurt mix into the flour mix and stir to combine. Add the flour-coated blackberries in the final few strokes.
  7. Spoon the combined mixture into the muffin tray and bake for 25 mins.
  8. Remove from the tray/mould when the muffins have slightly cooled, and let cool fully on a wire tray.

Customise it!

Missed the blackberry season? Don’t worry – substitute another fresh berry, such as raspberry or blueberry, and the muffins will be nice also.

If you do venture into the countryside to go blackberry picking, here’s a topical track from The Farmer’s Boys to get you in the mood.

Categories
Blog Breakfast

The Sweetest Feeling

During the recent period of national mourning, I spent a few days in Essex visiting relatives. I made a point of stopping off at Tiptree, home of the famous jams and marmalades produced by Wilkin and Sons since 1885. I learned that their range of preserves has been supplied to the Crown under Royal Warrant since 1911, and is enjoyed in over 70 countries all around the world. I wonder if you have heard of it where you live?

On the same site as the factory where the jam is made, you can tour a museum display explaining how the company has grown over the years from its Victorian origins. There is also a shop selling the full range of preserves, including some varieties I was unaware of, such as Little Scarlet (a type of strawberry).

On display is a selection of spicy sauces and chutneys to choose from. We brought some chilli jam as a gift for our son. It’s a great place to treat yourself, and friends and family. Hey, we deserve it!

I opted for a jar of Old Times English Orange Marmalade to take home, which (as you can see) I shall be enjoying over many breakfasts ahead. It has a very delicate balance between bitter and sweet.

However, my highlight, and undoubtedly a favourite part of the visit for many devotees, is (not totally surprisingly) the Tea Room. Here you can place your order and, while waiting at a table for your own delights to arrive, be entertained by the succession of delicious cakes and carefully trimmed sandwiches making their way to the tables around you, beautifully presented on old-fashioned 3 tier china cake stands.

I opted for afternoon tea, with a toasted teacake and a choice of preserve, washed down with a pot of tea. My chosen preserve was a miniature jar of dark morello cherry jam, which was delicious. You can see it in my main photo, along with the fittingly sweet message on the underside of the lid, which says simply:

From Tiptree With Love

Categories
Mains Recipes

Chilli Mushroom with Lime & Sea Salt Buttered Veg

A roasted filled portobello mushroom makes a great vegetarian dinner. It holds its shape and texture when cooked and releases its juices when you cut into it with a knife. In this dish it is combined with summer veg served with melting slivers of butter infused with lime, sea salt and chilli flakes.

Servings

This will make one serving, so multiply up by however many mouths you are feeding (I’ll say more about this below!)

Timings

20 mins to make the vegetable chilli filling, then 20 mins in the oven to roast.

You Will Need

  • 1 stick celery
  • half an onion
  • 1 carrot
  • 1 tsp chilli powder
  • 1 tsp cumin seeds
  • half a red, green or yellow pepper
  • a little vegetable oil
  • 1 tablespoon of plain flour
  • half a 440g tin of kidney beans
  • 300g vegetable stock
  • 60g red lentils
  • 1 portobello mushroom
  • seasonal veg (e.g. green beans, carrots) for one, boiled or steamed
  • 40g butter, softened
  • zest and juice of half a lime
  • a few twists of sea salt
  • a few chilli flakes

Method

  1. Put the chilli powder and cumin seeds in some oil, until sizzling.
  2. Finely chop the onion, celery, carrot and pepper and shallow fry until softened.
  3. Take off the heat and sprinkle the flour over. Turn the veg over until it is coated in the flour.
  4. Add the stock and bring to the boil. When boiling, add the lentils and kidney beans. Put on the lid of the pan and simmer for 10 – 15 mins until the lentils have softened.
  5. Remove the lid and let the mix reduce through evaporation, until you have a soft, thick consistency.
  6. Remove the stalk from the centre of the mushroom, chop and set aside. Brush the mushroom all over with oil.
  7. Fill the mushroom with the chilli mix, topping it with pieces of the stalk, gently pressed down into the mix. Place on a metal tray and roast in the oven at 180C for 20 mins.
  8. While the mushroom is roasting, chop and boil or steam the seasonal veg.
  9. In a small bowl, mix the butter, lime zest and juice, sea salt and chilli flakes. Place in the fridge until serving.
  10. Serve up the roasted mushroom with the veg on the side. Slice off a few slivers of the butter and let melt over the veg.

Customise it!

Lots of scope for going off piste here, while sticking to the fundamentals of a roasted portobello mushroom, a chilli filling and seasoned butter for the veg. Swap in other types of lentil or pulse, and use some drops of tomato passata if you wish along with the stock. Choose whichever veg you prefer to serve on the side, and prepare it as you like it. Garlic goes well in both the chilli mix, and especially in the butter.

I’ve given the measurements to make one portion here. However, I would quite often make a larger pot of the vegetable chilli and serve some of it on other occasions, in a different way (e.g. with rice) or freeze some of it for a later date. Similarly, the seasoned butter is great with other foods, such as sweetcorn and fish, so I sometimes make a larger batch of that as well.

In other words, don’t be afraid to gross up the amounts. Stick to the instructions above and you’ll have a nice meal for one. Go larger and who knows – you may have enough to feed a Seven Nation Army. Cue the White Stripes!

Categories
Blog

Tea at the Palace

In 2014 I received an invitation from HM The Queen to attend a Garden Party at Buckingham Palace.

It was really exciting travelling up to London on the train, and making our way to the Palace. Usually all one gets to see is the famous view from the Mall, on the outside of those imposing railings. How excited we were to be invited through the gates, walk across the courtyard and enter the Palace, making our way through to the vast terrace that overlooks the rear gardens.

The gardens were huge – more like a public park, with paths and beautifully mature planted borders winding off in all directions. While there were many people there for the Garden Party, it was still possible to find yourself alone in a remote corner, and easy to forget that we were actually in the heart of one of the world’s busiest and noisiest capital cities.

A highlight for me was the afternoon tea. I have posted photos of both the menu, and my plate with selections from the finger buffet. You will see from these that I was enjoying the daintily trimmed sandwiches – cucumber, mint and black pepper, and also free range egg mayonnaise with cress. There is also a coronation chicken wrap with spinach and peppers.

The cakes were superb – my plate loaded with Dundee cake, strawberry and cream battenburg, and a chocolate and praline croustillant that bears an edible Royal Crown motif. My choice of drink is an iced coffee.

The members of the Royal Family in attendance were HM The Queen, HRH The Duke of Edinburgh and HRH The Duchess of Cambridge (now the Princess of Wales).

I was one of many invitees drawn from public services and the charity sector. An invitation to afternoon tea at a Buckingham Palace Garden Party was the Queen’s way of thanking us for our contribution, day in and day out, to supporting Britain’s local communities. It was a really nice gesture that was warmly received by all of us.

Following the sad events of this week, as a mark of respect I will be taking a short break from posting during the period of national mourning, after which normal service will be resumed.

Categories
Mains Recipes

Turkey, Feta and Courgette Burgers

I’m pleased to announce that we have another guest post on A Different Kitchen! It is by my sister Pamela, an experienced and talented cook whose meals I have enjoyed on numerous occasions. 

Hi. My featured meal is Turkey, Feta and Courgette Burgers. I have used this recipe many times. It’s healthy, tasty, easy and uses up some of the mint in our garden (you can see some of our mint bush in the photo). It is also useful if you have an abundant courgette (or zucchini) harvest, which some of you may be experiencing at this time of year.

Servings

Depending on your preferred size of burger, the recipe makes as many or as few burgers as you like!

Timings

10 mins prep, and 10 mins to grill.

You Will Need

  • 500g turkey breast mince
  • 1 large courgette, spiralised or cut into tiny cubes (I use a Kenwood mini chopper)
  • 100g feta crumbled
  • 2 crushed garlic cloves
  • half teaspoon chilli flakes
  • small bunch of mint, finely chopped
  • 1 teaspoon sumac powder
  • zest of an unwaxed lemon
  • 1 large egg beaten

Method

  1. Mix all the ingredients together in a large bowl with your hand and shape into burgers.
  2. Place these on a baking tray lined with tin foil and cover with cling film.
  3. Put these in the fridge to firm – the smell is amazing.
  4. At this stage you can also freeze the burgers – or some of them – for another day.
  5. Put the tray under a hot grill and cook the burgers for 8-10 minutes, gently turning, until golden brown. 
  6. Enjoy with a fresh salad. No burger baps required!

Well done Pam and thanks for sharing this delicious looking recipe.

The author of a guest post gets to choose a favourite track of theirs for adding to the ADK Playlist. Pam’s choice is Happy by Pharrell Williams. She saw him performing the song live and says it was brilliant!

Categories
Blog

Lost in the Supermarket

Cooking from recipes prepared by our top chefs can sometimes involve tracking down rather obscure ingredients. Even if we have a vague awareness of the product, we may never have tasted or tried to buy it before. Items that fall into this list for me have included porcini mushrooms, Szechuan pepper, rose harissa and kashmiri chillis.

Searching out products that are unfamiliar can be a challenge. I am fortunate to have a large Sainsbury’s and a cavernous two tier Tesco’s virtually on my doorstep, but can I find these ingredients there?

The usual story begins with checking out where I thought they would be, but without success. My visit then descends into a kind of aimless cruising of the trolley up and down the aisles in the hope of inspiration, or at least that something associated with the item will catch my eye. In a place this size, I’m thinking, surely it must be here, somewhere?

How long to carry on with this pursuit can be a tough call – depending on your viewpoint, it demonstrates either a laudable spirit of not wanting to be defeated, or a petulant state of blind obstinacy.

Of course, I could ask an assistant. However, I never want a member of staff to feel that I expect them to have an encyclopedic knowledge of where everything is displayed, in a store the size of an aircraft hangar. Eggs, bread, cereals – fair enough, but something that even I have never heard of outside of a Jamie Oliver book? Forget it.

My go-to now for specialist ingredients is Waitrose. I learned this after a fruitless search for tahini in the larger stores. On arrival at a smaller branch of Waitrose, a very helpful assistant escorted me to the correct aisle and shelf, pointing out that they had not just one, but three different types. Good old Waitrose.

Although we have a great range of food shops in the UK, we should always remember that they are not all the same – each carefuly targets their own market niche, and as cooks/consumers we should be prepared to use this to our advantage.

After one of these experiences recently, I was playing The Clash’s great London Calling album in the ADK kitchen, and this track Lost in the Supermarket came on. It made me chuckle and I thought I would share it here. To be fair, I am pretty certain that Joe Strummer and Mick Jones didn’t intend this song to be about walking round Waitrose looking for tahini. Then again, you never know.

Categories
Blog Desserts Snacks

Take Me to the Beach

We spent the long bank holiday weekend by the beach at Branksome. The weather is still great here, and it was easy to swim in the sea each day. On the final day the breaking surf was a little too choppy for my liking, so I settled for going in knee high, and a barefoot run along the shore, stepping and splashing through the lapping waves.

One of the many pleasures in a trip to the beach is an ice cream from the kiosk. On this occasion, I noticed that they were stocking the new Vegan Magnum, and decided to give it a try. It’s a dairy-free version of the legendary ice cream on a stick. I’m not vegan, but I am always open to trying new foods and have enjoyed a number of vegan desserts in the past.

I wasn’t sure what to expect – the Magnum I consider to be no less than a modern design classic, and I did wonder if messing around with its ingredients may turn out to be a disaster. I was thinking of what happened when Coca Cola decided to update a famous soft drink that everyone had grown up loving, only to have to yield to popular opinion and go back to making it by the original recipe.

I have to say I was pleasantly surprised. In fact, it is quite difficult to point out the differences in a blind taste. The Vegan version still has a delicate chocolate couverture, made from coconut oil and cocoa butter, that fragments indulgently as you bite into it. The underlying ice cream, made from pea protein with vanilla, is sweet and velvety, and not at all (as I had feared) unduly coconut tasting. The only real difference I could pinpoint is slightly less richness to the creamy taste, but not in any way that would put me off buying another.

Dairy-free alternatives to foods have been growing in popularity for some time. A relevant factor in this is concern about the contribution made by the livestock industry to climate warming, and consumption of water at a time of increasing drought. Many believe a vegan diet brings health benefits and is kinder to animals.

What is clear is that anyone who is vegan can now enjoy a Magnum when they visit the beach, a theme park or go on any other great day out: a wonderful contribution to the cause of equality of opportunity.

I’m hoping there will yet be a few more trips to the beach before the summer is through. That will probably mean a few more Vegan Magnums to come, as I make the most of our Pure Shores.

Take Me to the Beach!

Categories
Desserts Recipes

Plum and Almond Crumble Squares

Those following on Twitter (@differentkitch) may recognise the above photo from my tweet earlier in the week. It shows a batch of lovely Victoria Plums, which have recently come into season and are appearing on our market stalls. This post shows how I turned them into Plum and Almond Crumble Squares.

I researched some plum recipes, with the general idea that I felt they would be great in a traybake. I settled upon one in BBC Good Food and, as usual, modified it to my liking.

The Squares have several layers, beginning with a biscuity base. On top of this is an egg custardy/almond/ bakewell pudding type layer, and then the subtle taste of the chopped plums. The main area where I modified the recipe was on the topping, adding rolled oats, pumpkin seeds and sunflower seeds to flaked almonds. This makes a crumble finish which is totally loaded, adding a toasted crunch as it bakes.

Servings

This will make 16 square slices (4 had already been eaten when the above photo was taken!)

Timings

Total prep time about 25 mins, total cooking time about 1 hr – 1hr 10mins.

You Will Need

  • 250g baking spread
  • 225g caster sugar
  • 300g ground almonds
  • 140g plain flour, plus an additional 25g
  • 2 eggs
  • 1 teaspoon mixed spice
  • 1 teaspoon baking powder
  • 7 plums, stones removed and cut into slices
  • 50g flaked almonds
  • 50g rolled oats
  • 25g pumpkin seeds
  • 25 g sunflower seeds

Method

  1. Grease and line a baking dish with baking paper. My baking dish was 20cm square. Cut one piece that extends across the base and two opposite sides, leaving a little overhanging on each side. Paste a strip on each of the two remaining sides.
  2. Put the baking spread, sugar and ground almonds in a food processor with blade fitted. Pulse until it is mixed.
  3. Remove the mix from the food processor and reserve half of it aside. Put the other half back in the processor with the 140g flour, and mix till it forms a dough.
  4. Remove the dough and flatten it out with a rolling pin on a floured surface. You will not be able to lift it up in one piece (like a pastry base) but, as it gets flatter, lift it in pieces and gradually place these in the base of the baking dish. Press it down with the back of a spoon and distribute it so that it covers all of the base and at least about half way up the sides. It will all meld together as it bakes.
  5. Fill the base with a piece of crumpled up baking paper and baking beans, and place in the oven to bake blind at 180C for 10 – 15 mins. The edges of the base should be beginning to brown.
  6. While the base is in the oven, make the filling. Into the food processor goes the reserved half of the spead/sugar/almond mix. Add the 2 eggs, the 25g flour, mixed spice and baking powder. Pulse it to form a creamy batter.
  7. Remove the base from the oven and add the batter on top. Then gently press the sliced plums into the top of the batter so that they remain visible. Make sure that they are evenly spread across the whole of the cake – when it is cut into squares you want each one to contain plums. Bake in the oven, still at 180C for 25 mins.
  8. In a bowl, mix the flaked almonds, oats, and the two types of seeds. Give them a good swirl so that they are well mixed up together.
  9. Remove the dish from the oven and sprinkle the topping over. As with the plums, ensure even coverage. Gently press the nuts, oats and seeds towards the batter mix, so that they will adhere to it, and not fall off when it is cut!
  10. Place back in the oven for another 25 mins. After about 20 mins, check it and insert a skewer in the centre. If it comes out clear, it is baked. If it has some uncooked batter on it, put back in for another 5 – 10 mins and keep an eye on it.
  11. When baked to your satisfaction, remove and leave aside to cool in the tin. When cool, the base will have set and you should be able to lift it out in one piece, by gripping the two overhanging sides of the baking paper liner.
  12. Put on a board and cut into 16 squares. I find a serrated (bread) knife is better for cutting through the sides of the crust, so that these doesn’t crumble. Any other sharp knife will cut through the bottom of the base.

Customise it!

You could add other types of nuts and seeds to the crumble topping – whatever you fancy really. Just make sure you press the pieces gently towards the batter so that they adhere to the cake. Some of the crumble topping will still fall off and flake into your hand as you bite into it, but that is all part of the fun and indulgence of eating it. It’s food to make you feel good!